
Are you fascinated by the world of blogging but still stuck with where to start, what to consider, how to start a blog?
Relax.
This comprehensive guide of 25000+ words is designed to walk you through the process of creating a blog, from start to finish ( Trust me, Nothing is left after this to cover ).
It’s a promise – stick with me, and by the end of this article, you’ll be ready to launch your blog.
And, Don’t worry about the investment.
We’ll only be talking about investing in Hosting & Domain here because, believe it or not, almost everything else you’ll need is available for free!
To make the most of this guide, put your phone on ‘Do Not Disturb’ mode, grab a cup of coffee, and get ready to dive in.
I’ve helped rank many websites and thousands of keywords over the years, and I’ve poured all my experience into this guide. So, get set to embark on your blogging journey – you’ve got a seasoned guide with you every step of the way. Let’s get started!
Deciding Your Blog’s Purpose And Niche

As a blogger, your worst nightmare is to have potential readers leave your site because they couldn’t find something they were passionate about.
This is where a ‘blog niche’ comes in.
A blog niche, at its core, is a specific topic or subject that you write about consistently in your blog.
It’s your area of expertise, your calling card. It’s the primary way your blog becomes the go-to place for readers interested in that particular subject.
However, choosing the right blog niche is not a stroll in the park, it’s more of a trek up the mountain; the view at the top is breathtaking, but the journey requires careful planning and preparation.
We are going to help you navigate this tricky terrain. We will be diving deep into what a blog niche really is, why it’s crucial, and how to find and validate one that’s perfect for you.
So, if you’re just beginning your blogging journey or you’re a seasoned blogger looking to redefine your niche, stay tuned and let’s discover how to carve out your perfect corner of the blogging world together!
Why Do You Need a Blog Niche?
Establish Authority:
Blogging in a specific niche allows you to become an expert in that field. The more quality content you put out on a particular subject, the more you establish yourself as an authority.
When readers see you as an authority, they’re more likely to trust your opinion, recommend your blog to others, and become repeat visitors.
Attract and Retain a Targeted Audience:
People follow blogs for two main reasons: they either enjoy the blogger’s writing style or they’re interested in the blog’s topics.
Having a clear niche allows you to attract and retain a targeted audience who are passionate about the same subject as you. They’re more likely to engage with your content, share it, and even become loyal followers or subscribers.

Better Monetization Opportunities:
Blogs with a clear niche often attract advertisers and sponsors who want to reach that specific audience.
Whether it’s through affiliate marketing, sponsored posts, or selling your own products or services, a niche blog can provide you with better opportunities for monetization compared to a general blog.
Search Engine Optimization (SEO):
Niche blogs are easier to optimize for search engines. By consistently writing about a particular topic, you’ll naturally include keywords and topics that people are searching for in that niche.
This improves your blog’s visibility on search engine results pages, leading to increased traffic to your blog.
Passion and Longevity:

Lastly, choosing a niche you’re passionate about can make blogging more enjoyable and sustainable in the long run.
You’re less likely to burn out or run out of content ideas if you’re deeply interested and invested in your blog’s subject matter.
It can be the difference between seeing your blog as a chore or a labor of love.
In short, a well-chosen blog niche can make your blogging journey more rewarding and successful.
It can guide your content creation, help establish your authority, attract a dedicated audience, provide monetization opportunities, improve your SEO, and fuel your passion for blogging.
Understanding a Blog Niche: A Crucial Lesson
Definition of a Blog Niche:
A blog niche is a specific topic or area of interest that you focus your blog content around.
It defines the framework of your blog and allows you to connect with a targeted audience interested in that particular subject. It’s what sets your blog apart from the rest, giving it a unique identity.
The Importance of Market Research:
To understand a blog niche, you must first understand the audience and the market you’re targeting.
Market research is the process of collecting and analyzing information about your potential readers’ interests, preferences, and buying behaviors.
This will help you identify topics that are in demand, know the trending keywords in your niche, and understand what your competition is doing.

Identifying Your Passion and Expertise:
The next step in understanding a blog niche is identifying your own passion and expertise.
What topics do you feel strongly about? What subjects are you knowledgeable in?
Remember, blogging is a long-term commitment, and if you choose a niche that you’re not passionate about or familiar with, you may lose interest or struggle to create quality content.
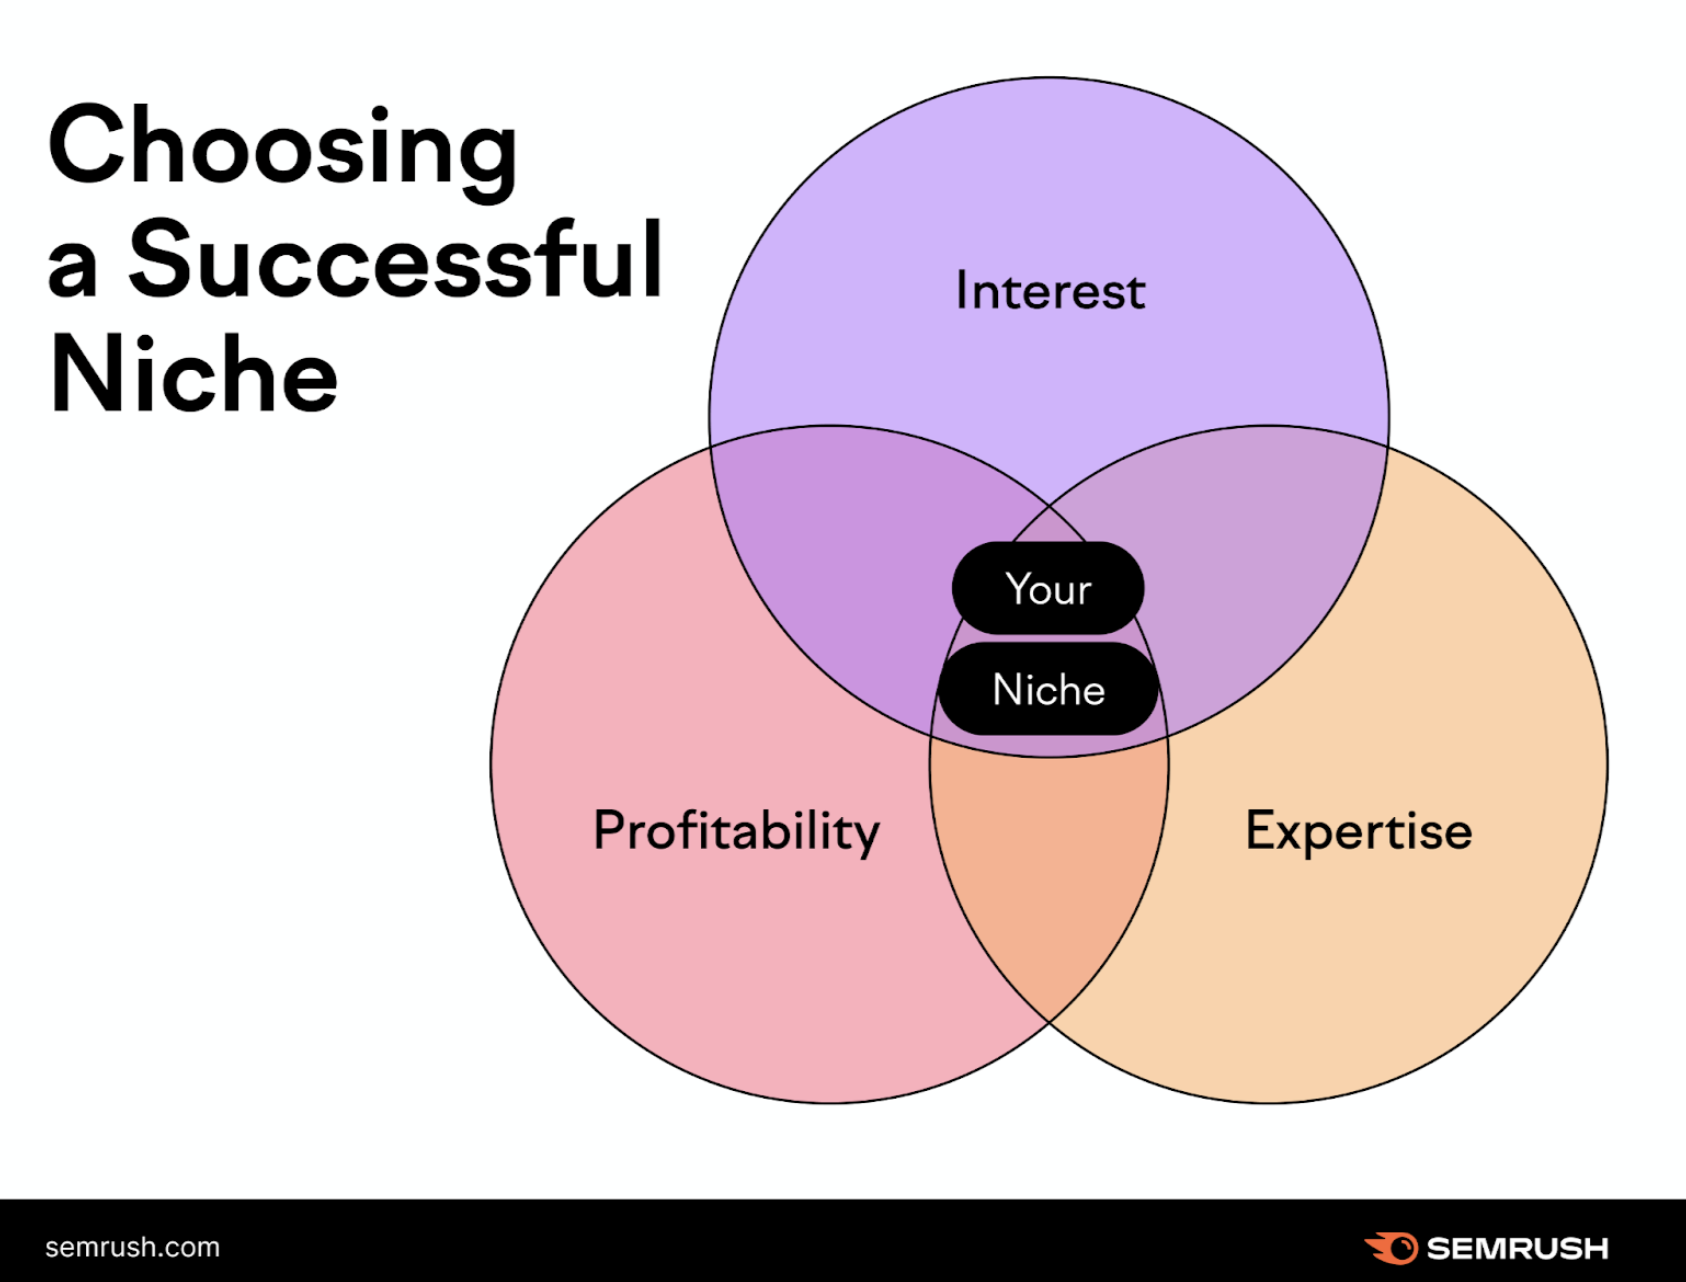
Intersection of Your Passion, Expertise, and Market Demand:
The sweet spot for a blog niche is where your passion, expertise, and market demand intersect.
This is where you’ll be able to produce high-quality content consistently that your audience will love and share.
The Role of Keywords in Your Niche:
Keywords play a crucial role in defining your blog niche. They’re the words or phrases that people type into search engines when they’re looking for content like yours.
Incorporating these keywords into your blog posts will help increase your blog’s visibility and reach more potential readers.
Understanding this concept is essential when considering a niche for your blog.
The Concept of Sub-niche:
Finally, it’s crucial to understand the concept of a sub-niche. This is a smaller segment within your larger blog niche, allowing you to focus even more precisely on a specific topic.
For instance, within the niche of “healthy eating”, a sub-niche could be “gluten-free recipes for busy parents”.
Sub-niches can help you stand out from the competition and attract a more targeted audience.
Understanding a blog niche goes beyond just knowing its definition. It requires an understanding of your target market, your passion and expertise, the intersection of these elements, the importance of keywords, and the concept of sub-niches.
By fully grasping these concepts, you’re more likely to choose a successful blog niche and achieve your blogging goals.
Starting Your Niche Brainstorming Process

Uncovering Your Interests and Passions:
Begin your journey into identifying your blog niche by introspecting on the topics that genuinely excite you.
It could be anything from astronomy to yoga or anything in between. Blogging requires commitment, and passion for the subject matter is an effective fuel for longevity.
Remember, these topics will be the foundation of your blog, the themes you’ll be creating content around for a long period.
Recognizing Your Unique Skills and Expertise:
Once you have a collection of topics that align with your interests and passions, it’s time to consider your unique skills and areas of expertise.
Where do you excel? These areas of competence not only provide a distinct perspective to your content but also make it reliable and engaging for your audience.
Your skills and expertise could be related to your professional background, a unique life experience, or a hobby you’ve spent years mastering.
Identify Issues You Can Resolve:
The most successful blogs often solve problems or provide guidance. Look at your list and consider whether any of your interests or areas of expertise also align with common problems people face.
Whether you’re explaining difficult concepts or offering lifestyle tips, providing value through problem-solving can make your blog a go-to resource.

Investigate the Market:
Once you’ve identified your key strengths and areas of interest, delve into some market research.
Use tools like Google Trends, SEO software, and social media to gauge the popularity and competitiveness of your potential niches.
Remember, a great niche isn’t just something you’re passionate about—it should also be something others are interested in.
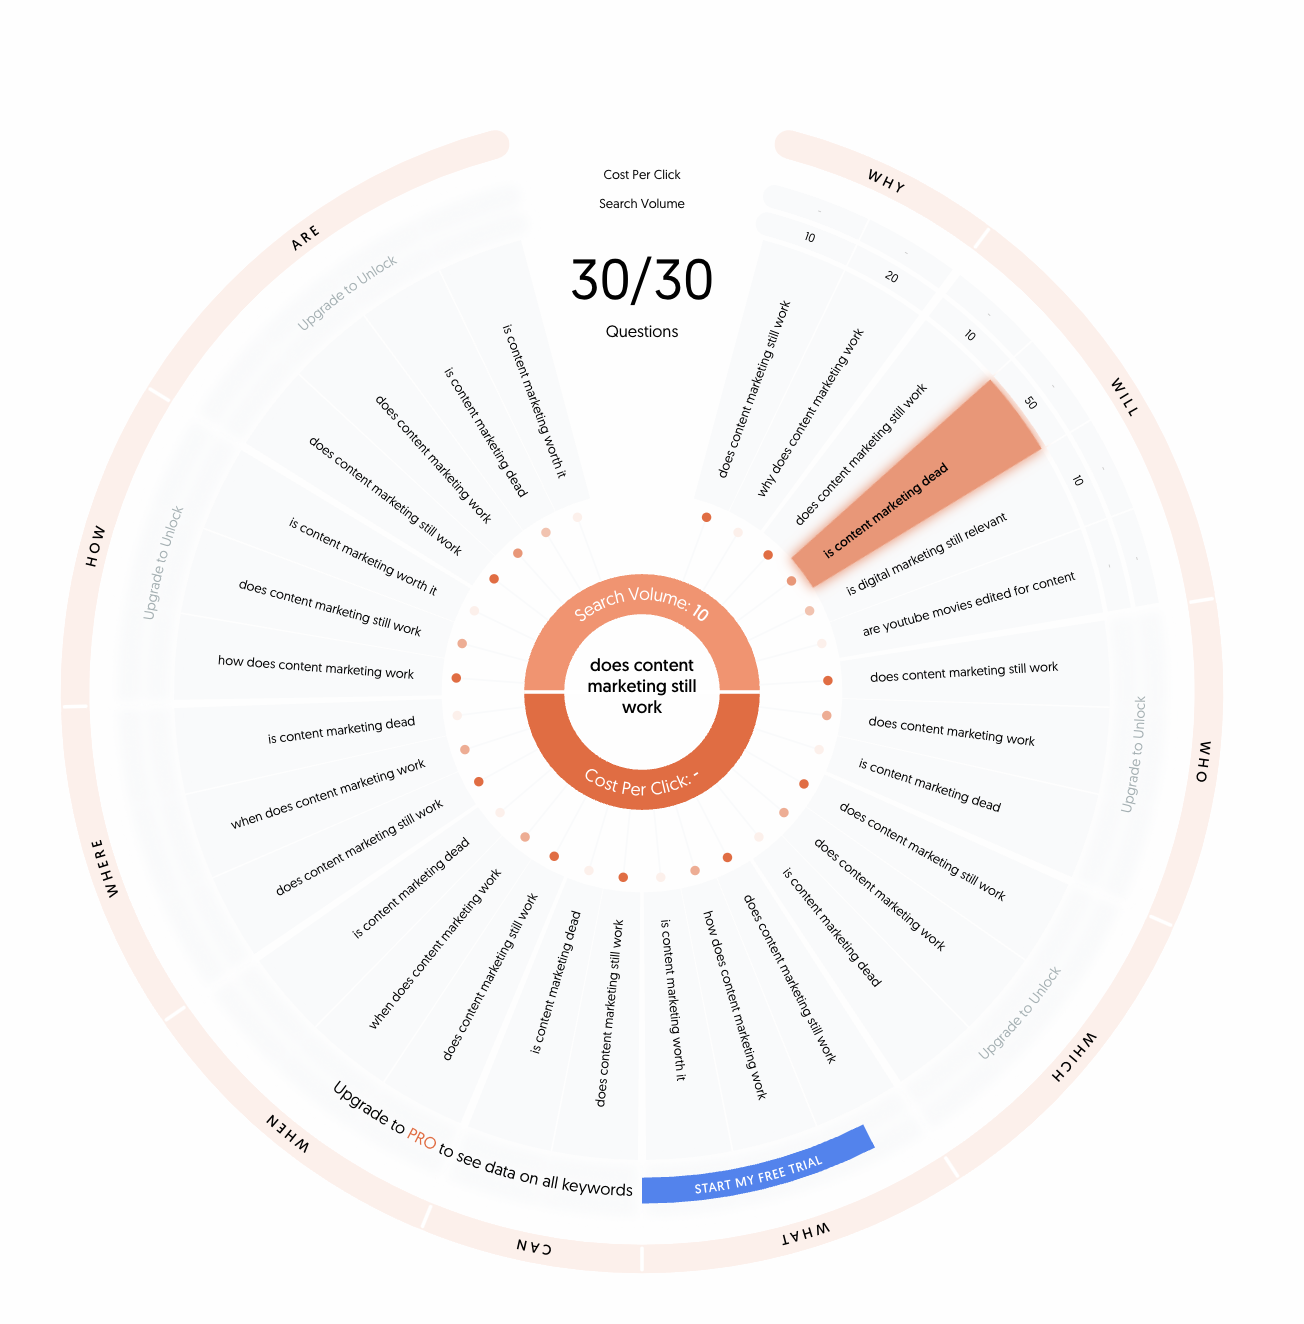
Utilizing Google Trends to Gauge Niche Popularity and Interest
Google Trends is an effective free tool to begin your exploration of potential niches. By inputting main terms related to your niche(s), you can quickly discern two crucial data points:
- The extent to which people are actively searching for your niche.
- The direction of interest in your niche – whether it’s growing or waning over time.
While Google Trends doesn’t provide an exhaustive analysis, it offers a starting point that’s easy to use.
For instance, an illustration shows how the interest in the paleo diet has somewhat declined but remains a popular topic. The tool also enables you to compare different niches’ popularity.
As shown, the keto diet was more popular than the paleo diet in 2018, which might influence your decision if you’re considering starting a blog on one of these topics.
However, Google Trends alone isn’t enough for an in-depth understanding as it uses relative numbers indicating trends, not absolute search volumes.
Therefore, for a more precise understanding of how many people are searching for terms in your niche right now, you’ll need to conduct keyword research.
Keyword research involves brainstorming a list of keywords associated with your niche and then using a tool like KWFinder or Semrush to determine the monthly search volume for each keyword.
Such tools also suggest related keywords, providing a broader view of your niche.
As a general guideline, your main search terms should have several thousand searches per month to ensure enough interest for generating blog post ideas.
Otherwise, if there aren’t many people searching for the main terms, finding compelling blog post topics might prove challenging.
Unearth Sub-Niches:
With a better understanding of the market, you might realize some of your potential niches are quite broad.
In this case, identifying sub-niches (more specific topics within a broader niche) can be an effective way to distinguish your blog. For example, if your main interest is fitness, a sub-niche could be “vegan bodybuilding” or “yoga for seniors.”
Consider Monetization Opportunities:
The final step in your brainstorming process is to consider how each potential niche could be monetized.
This is especially important if you’re hoping to make blogging your primary source of income.
Are there related products or services you could promote? Is there scope for sponsored content, affiliate marketing, or even creating and selling your own products or courses?
Brainstorming your blog niche is a creative and thoughtful process. By thoroughly considering your passions, skills, the market, and potential monetization, you are laying a strong foundation for a successful and fulfilling blogging journey.
Validating Your Niche Ideas
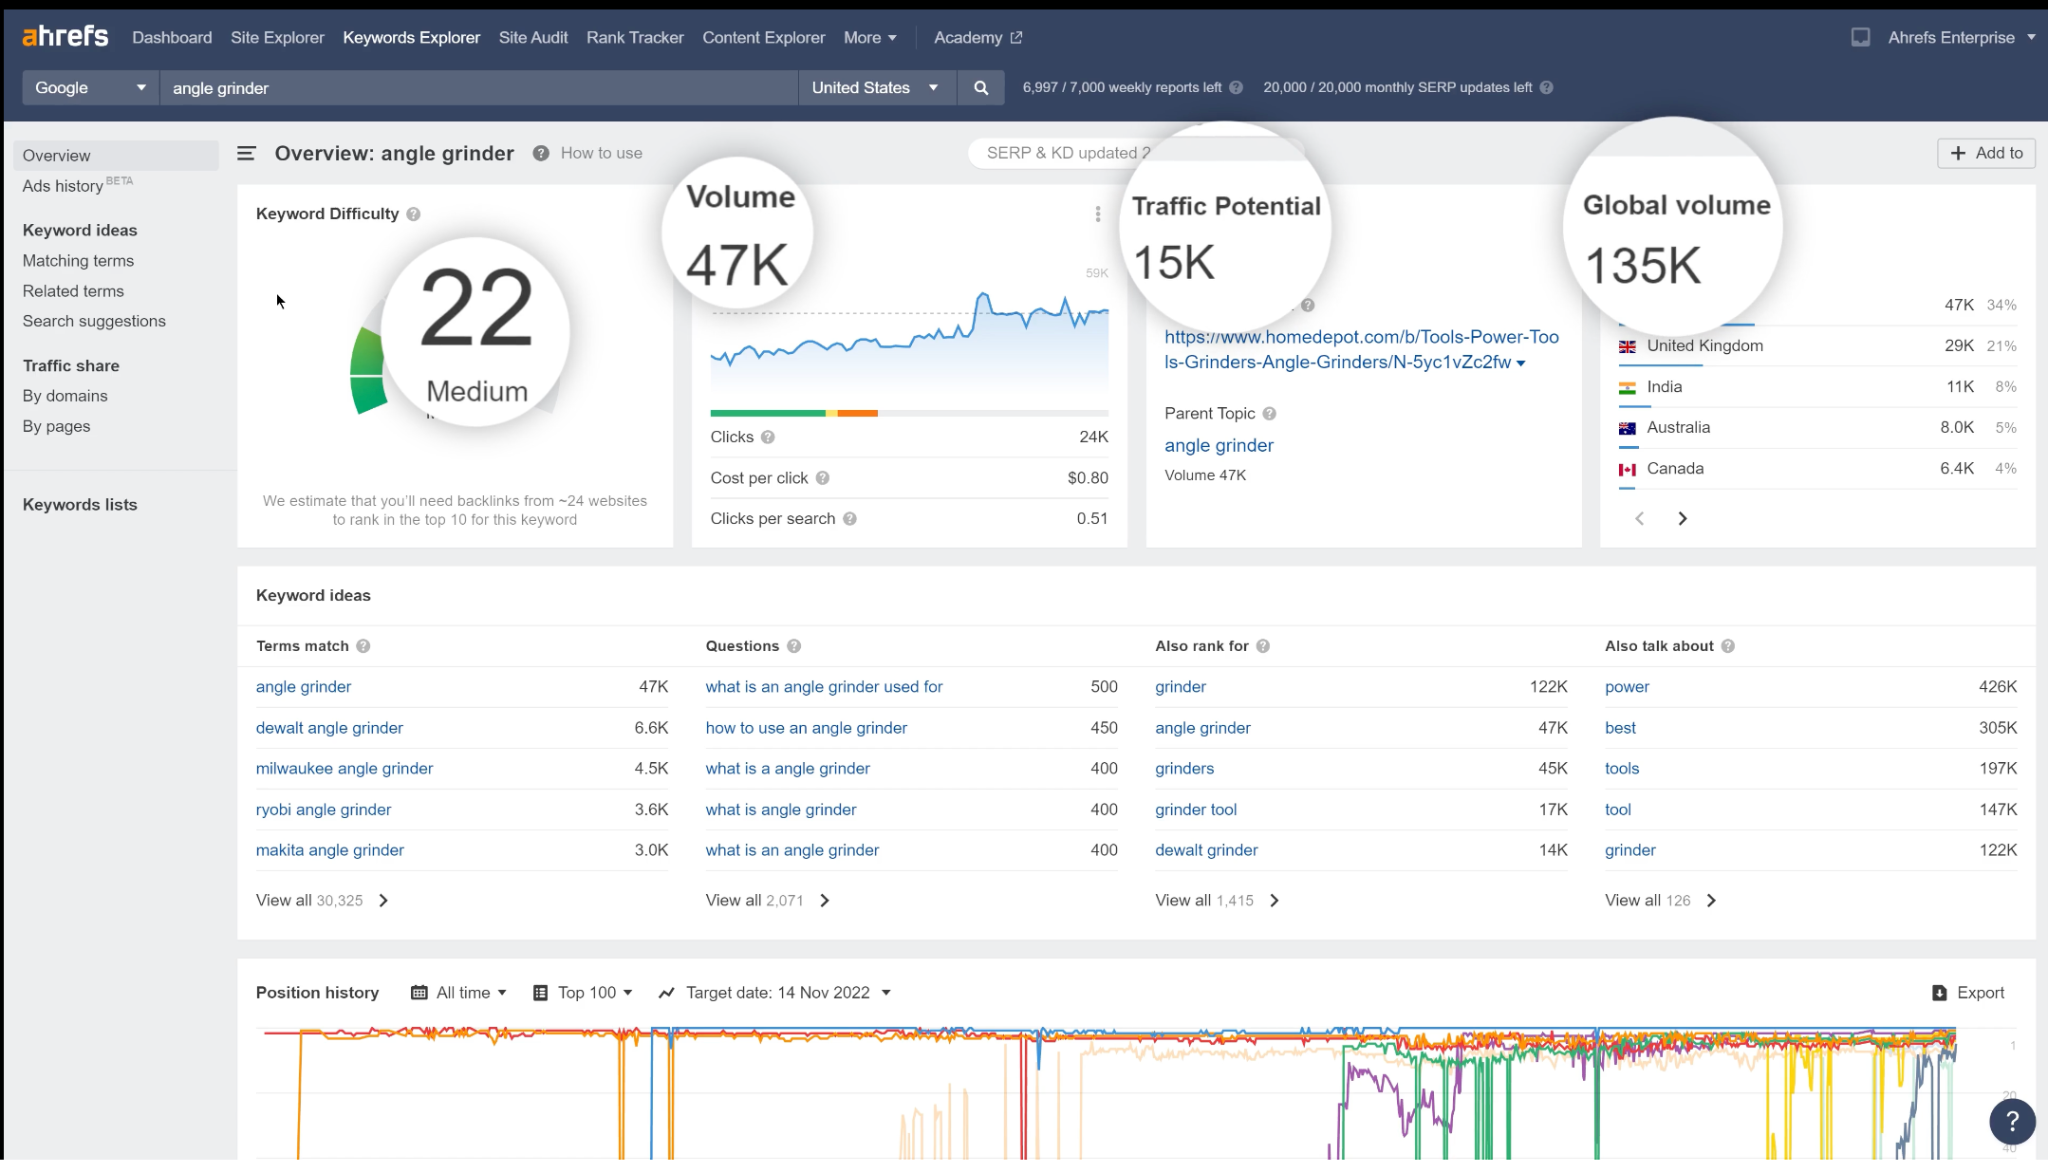
- Keyword Research: Use keyword research tools like Google Keyword Planner, Ahrefs, or SEMRush to understand the demand for your chosen niche. If people are searching for keywords related to your niche, it’s a good sign that there’s interest and potential for traffic. On the flip side, if very few people are searching for your niche, it may not have the level of interest required for a successful blog.
- Competitor Analysis: Research other blogs in your potential niche to understand the level of competition. If there’s no competition, it might be a red flag that there’s little interest in that topic. Conversely, if the niche is oversaturated with big, established blogs, it may be challenging to make your blog stand out. Look for niches where there is some competition (indicating interest) but still room for a new voice.
- Potential for Monetization: Is there potential to earn revenue from your chosen niche? Look at the types of products and services you could promote through affiliate marketing, the possibilities for sponsored posts, and whether you could create and sell your own products or services related to the niche.
- Social Media Trends: Platforms like Instagram, Twitter, Facebook, and LinkedIn can provide a wealth of information about trending topics. Do some exploration on these platforms to understand what’s being discussed in relation to your niche. A high volume of conversation could suggest a thriving market.

- Engagement and Community: Are there active online communities around your niche, such as forums or social media groups? These can serve as an indication of a passionate audience that’s interested in your topic. They can also be great places to engage with potential readers and promote your blog once it’s live.
- Flexibility and Future Potential: Lastly, consider whether the niche has room for growth and evolution over time. A niche that’s too narrow might limit your content possibilities in the long run. You want to choose a niche where you can continue to find fresh topics and perspectives for years to come.
Validating your niche ensures that your blog has the potential to attract readers, stand out from the competition, and provide you with income opportunities.
This essential step ensures that you’re not just following your passion, but also creating a viable blogging business.
The Key Questions for Validating a Niche
When validating your niche, it’s crucial to ask the right questions to ensure it has the potential for success.
Here are six critical questions to guide your niche validation process:
Is there demand for this niche?
Look at search volumes using keyword research tools and check trending topics on social media platforms. High search volumes and social media trends can indicate a strong interest in your chosen niche.
Who are the competitors in this niche?
Identify other blogs that cover similar topics. A total absence of competition might suggest low interest, while a very crowded niche could make it hard for your blog to stand out.
Aim for a niche with moderate competition, indicating that there’s interest but also room for a new player.
What’s the monetization potential?
Consider the possibilities for affiliate marketing, sponsored posts, and selling your own products or services.
If there are no relevant products or services to promote, or if the existing affiliate programs in your niche don’t offer good commissions, it might be challenging to earn income from your blog.
Are there active online communities related to this niche?
Presence of active forums, social media groups, or other online communities can suggest a passionate audience and potential opportunities for promotion and engagement once your blog is live.
Is this niche likely to stay relevant in the long run?
Some niches may be trendy for a while but lose interest over time. Consider whether your chosen niche has staying power and the potential to evolve and grow with you.
Can you consistently create high-quality content for this niche?
Lastly, consider your ability to generate fresh, engaging content within this niche over the long term. If the niche is too narrow, you might run out of topics.
Asking these questions can help you understand if your chosen niche is viable and has the potential for success. It’s all about finding a balance – a niche that you’re passionate about, but that also has demand, monetization potential, and the ability to keep providing value for years to come.
Unpacking Monetization Opportunities for Your Niche
After determining the viability of your chosen niche, it’s now time to dive deeper into potential monetization strategies.
Earning income from your blog isn’t just a nice bonus—it’s a crucial factor for your blog’s sustainability. Here are some ways to monetize your blog based on your chosen niche:
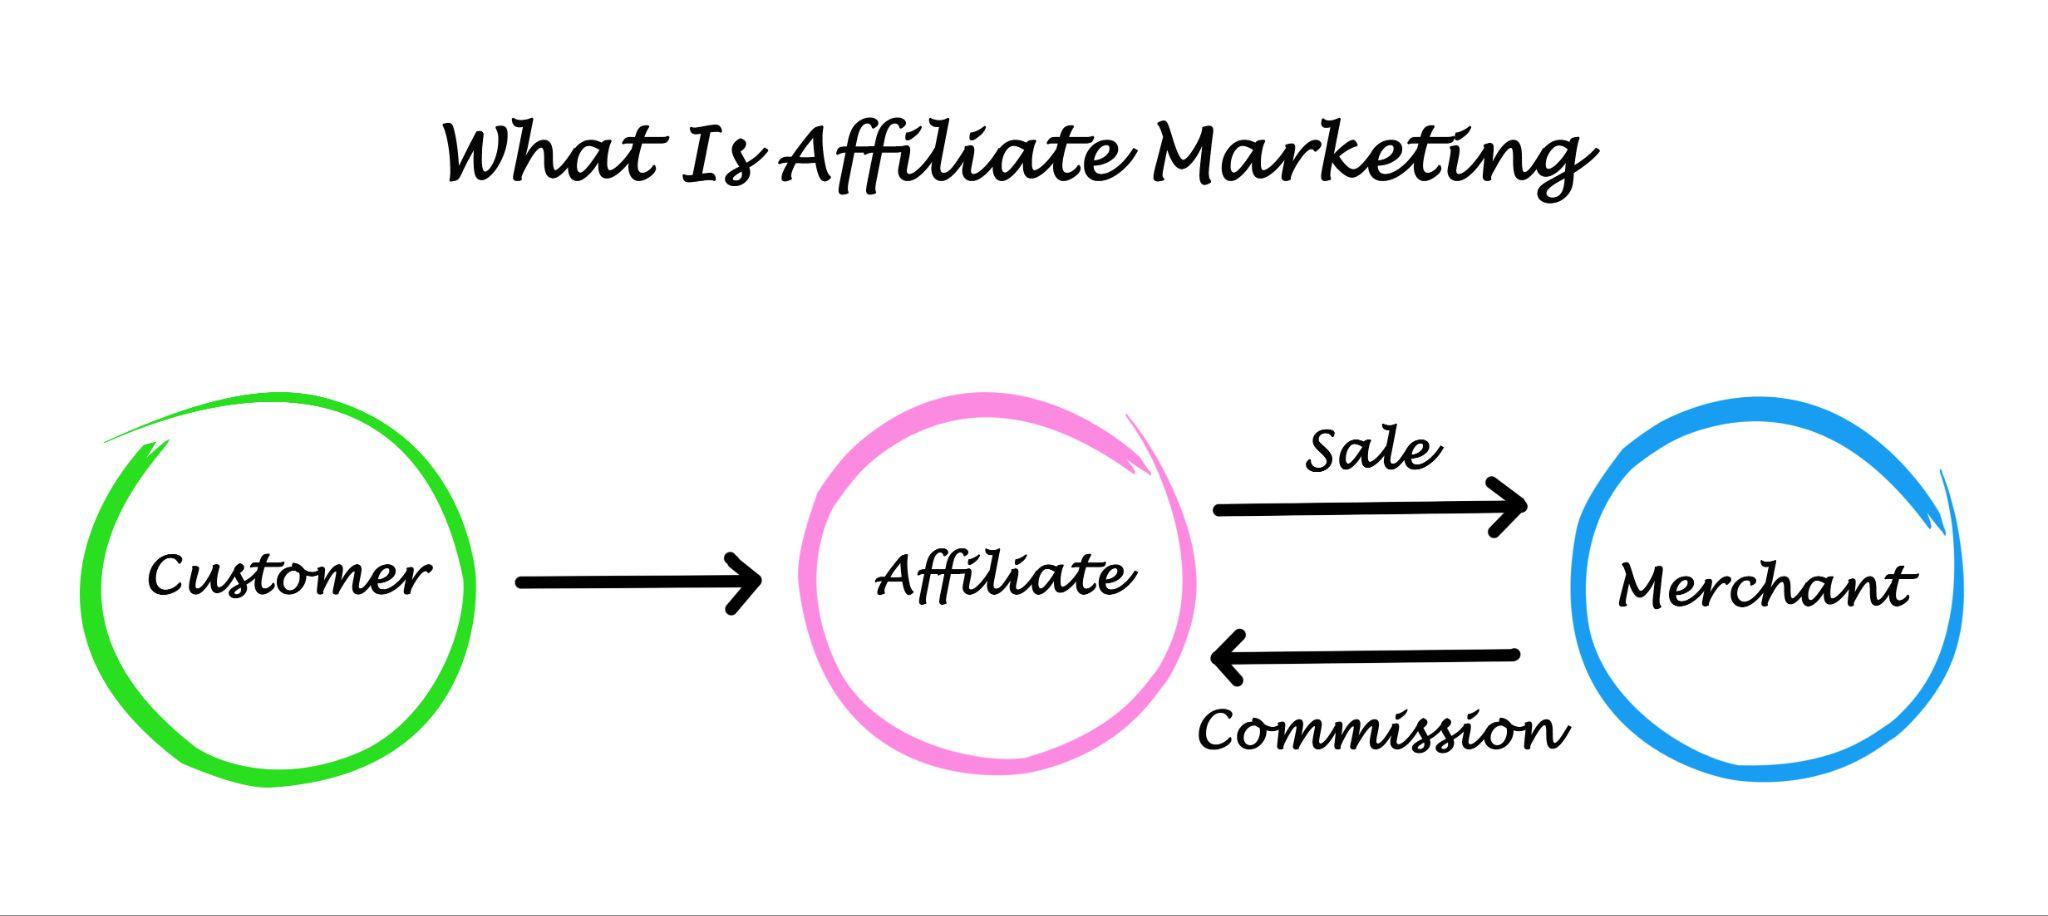
Affiliate Marketing:
This is a strategy where you promote products or services related to your niche, and earn a commission for every sale made through your referral link.
Look for affiliate programs in your niche that offer high-quality products and attractive commission rates.
Advertising:
Once your blog has a decent amount of traffic, you can monetize it through display ads. Google AdSense is a popular choice, but there are many other advertising networks out there.
Your ad revenue will depend on your blog’s traffic, the type of content, and where your audience is from.
Sponsored Posts:
Companies are often willing to pay for a blog post that features their product or service, particularly if your blog reaches their target audience. Be sure to always disclose when a post is sponsored to maintain trust with your readers.
Selling Your Own Products or Services:
If you have expertise in your niche, you could create and sell your own products or services. This could be an ebook, an online course, consulting services, or even physical products.
Subscriptions or Memberships:
If your content is exceptional, you might be able to charge for premium content. This could take the form of a subscription fee for access to exclusive blog posts, a membership for a community you create, or a Patreon for those who want to support your work.
Donations:
If your blog serves a passionate community, your readers may be willing to support you with donations. You can set up a PayPal donation button or use a platform like Ko-fi or Buy Me a Coffee.
Remember, monetization should not compromise the authenticity of your blog. The best way to monetize is by providing value to your audience.
If they find your content valuable, they will be more likely to support you, be it through purchasing a product you recommend, clicking on an ad, or directly supporting you via a subscription or donation.
Kickstart Your Niche Selection with famous Ideas
Now that we’ve covered the how’s and why’s of choosing a blog niche, let’s get those creative juices flowing.
Here is a curated list of blog niche ideas to help jumpstart your brainstorming process:
- Food: Specialize in a certain type of cuisine, food photography, baking, vegan or vegetarian diets, etc.
- Fitness: Focus on specific workouts, fitness for different age groups, diet and nutrition, etc.
- Travel: Share personal experiences, tips and tricks for budget traveling, traveling with kids, solo travel, etc.
- Parenting: Blog about the joys and challenges of raising kids, offer advice on parenting issues, etc.
- Fashion: Write about latest trends, ethical fashion, fashion for different body types, etc.
- Personal Finance: Provide advice on saving, investing, retirement planning, debt management, etc.
- Home Decor: Share DIY decor projects, tips for decorating on a budget, seasonal decoration ideas, etc.
- Technology: Write about latest gadgets, software reviews, tech news, cybersecurity, etc.
- Gardening: Share tips for growing vegetables, indoor plants, urban gardening, etc.
- Personal Development: Write about productivity, motivation, mindfulness, stress management, etc.
… and the list goes on, ranging from niches like beauty and skincare, to sustainable living, crafts, music, movies, real estate, pets, mental health, career advice, and many more.
Remember, the key to choosing the right blog niche lies in striking a balance between your passions, your expertise, and market demand.
This list is a starting point—feel free to mix, match, and tweak these ideas to suit your unique interests and skills.
Once you’ve found a niche (or a few) that resonate with you, revisit the validation and monetization strategies discussed earlier to finalize your choice.
Choosing the perfect niche for your blog can feel like a daunting task, but with some careful thought and research, you’ll be well on your way to creating a successful blog.
Exploring Blogging Platforms: Find Your Ideal Choice
Choosing the right blogging platform can be a daunting task. And you are not alone in this. There are just too many options out there. And the truth is, there isn’t a one-size-fits-all solution.
Every blogging platform offers something unique, and it’s crucial to choose one that aligns with your specific needs.
We’ll be comparing these platforms not just on their popularity, but also on ease of setup, learning curve, flexibility, and monetization capabilities. Whether you’re a beginner looking for an easy-to-navigate platform or an experienced blogger aiming for more advanced features, we have something for everyone.
So, are you ready to find the best platform that not only suits your blogging needs but also has the potential to grow with you as your audience expands?
Let’s get started.
Key factors to consider when choosing a blogging platform
Choosing a blogging platform requires careful thought and consideration. It’s not just about picking the most popular or the latest platform out there. It’s about understanding your needs and objectives, and finding a platform that aligns with them. Here are some critical factors you should consider when choosing a blogging platform.
Ease of Setup
If you are just starting out, you’ll likely prefer a platform that’s easy to set up, requiring minimum technical know-how. The process of getting your blog live should be intuitive and not take more than a few clicks and tweaks.
Learning Curve
Even the most user-friendly blogging platforms have a learning curve. You want to choose a platform that offers a balance between being easy to use for beginners and providing advanced features for when you grow and want to scale up your blog.
No Coding Skills Requirement
In today’s world, you shouldn’t have to learn to code to start a blog. A good blogging platform should allow you to manage your blog’s setup and maintenance without the need for coding skills. It should come with an easy-to-use interface and possibly a drag-and-drop builder.
Future Blog Goals
As your blog grows, your needs will change. Perhaps you’ll want to change the look of your site, add more features for your audience, or even start monetizing your blog. Therefore, the platform you choose should be flexible, with room for growth and advanced features.
Monetization Options
Even if you’re not planning to monetize your blog at the moment, it’s a good idea to consider platforms that offer monetization options. After all, who knows? You might change your mind in the future. So, the platform you choose should offer easy ways to monetize, like ad placements, sponsored posts, or options to set up an online store or paid memberships.
Your Blog Type
Lastly, the type of blog you want to start can also influence your platform choice. For instance, if you plan to sell products on your blog, you’ll need a platform with robust eCommerce capabilities.
By considering these factors, you’ll be better equipped to choose the blogging platform that suits your needs and helps you achieve your blogging goals.
Detailed Comparison of the Top Blogging Platforms in 2023
Are you ready to get serious about blogging?
We understand that blogging can seem overwhelming, especially when you’re starting from scratch. It’s not just about publishing content but choosing the right platform to do it.
Now we’re going to sift through the noise together and We’ll break down the top blogging platforms of 2023, weighing the pros and cons to help you make an informed decision. We’ll even share some insider tips on what to look for in a blogging platform.
By the end of this guide, you’ll have a clear roadmap to start your blogging journey. Sounds good? Let’s dive right in.
WordPress.org
WordPress.org, the world’s most popular blogging software, is at the forefront of the blogging scene, powering over 43.2% of all websites on the internet.
This open-source, free blogging platform came into existence in 2003 and has since evolved into a robust tool for creating diverse websites.
A crucial thing to note is that WordPress.org differs from WordPress.com, with the former being a self-hosted solution. This means that you will need to sign up with a WordPress hosting provider, but it also gives you complete control over your blog’s future.
Pros
- Complete control over every aspect of your website.
- The ability to grow your blog by adding features such as forums, an online store, paid memberships, and online courses.
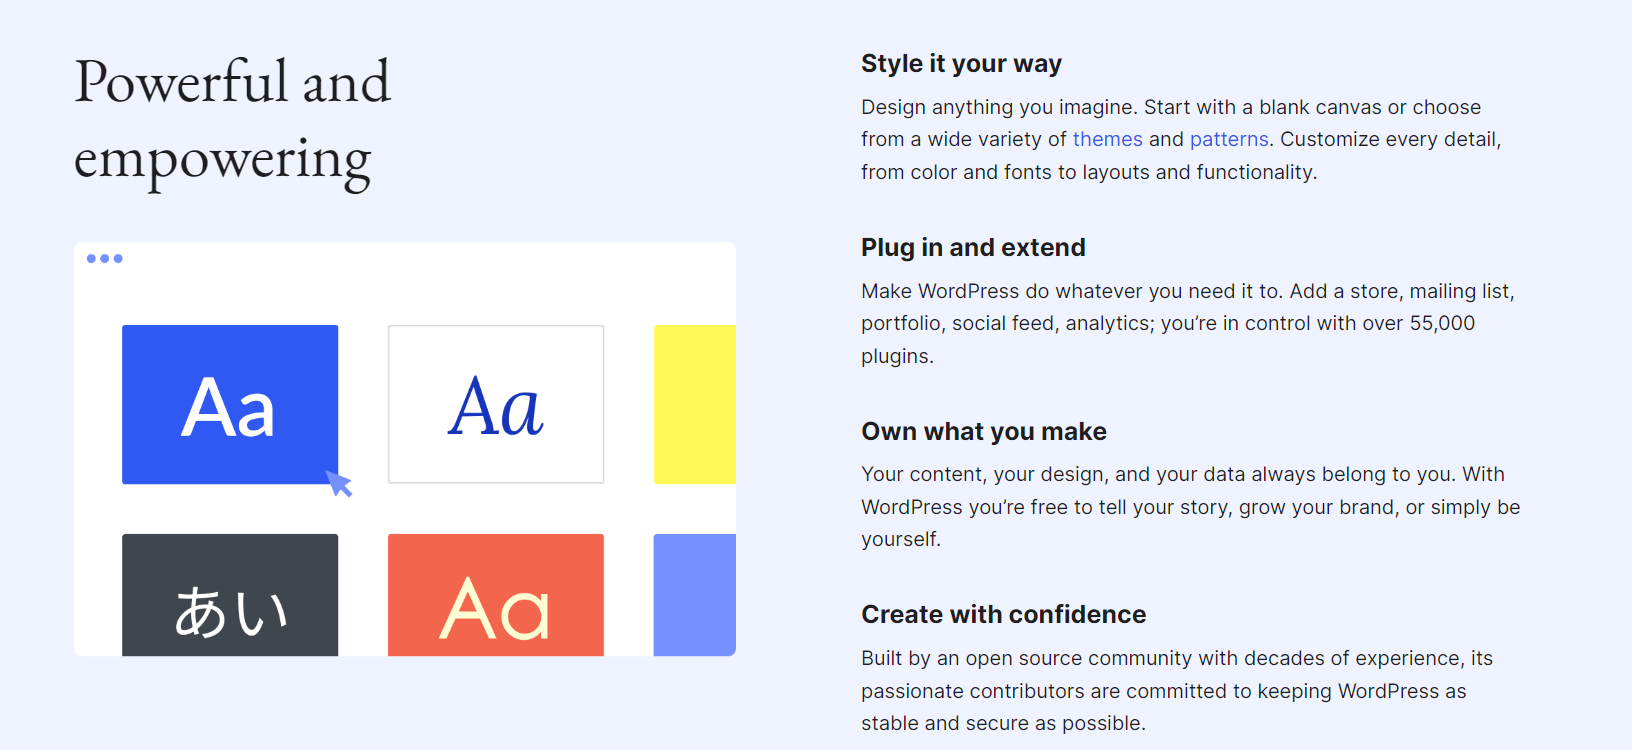
- Thousands of free themes, which allows you to make your website stand out. Most of these themes have built-in customization options, giving you complete control over the design without needing to touch CSS code.
- Access to over 60,500+ free plugins, enabling you to add features like contact forms, galleries, and more.
- SEO friendly, with easy creation of SEO-friendly URLs, categories, and tags for your posts. Plus, there are numerous excellent SEO plugins available for further optimization.
- Easy integration with Google Analytics for comprehensive website analytics.
- A drag-and-drop editor for easy creation of any type of content, along with options for embedding dynamic content such as videos, social media feeds, Google Adsense, graphs, and charts.
Cons
- There’s a bit of a learning curve as you familiarize yourself with the WordPress admin backend.
- You will need to manage your backups and security.
Pricing
The WordPress software itself is free. However, to get your blog online, you’ll need a domain name, which usually costs around $14.99 per year, and hosting, which typically starts from $7.99 per month.
Web.com

Web.com is a versatile platform known for its efficient website builder, which also includes a built-in feature to add a blog to your business website or online store. The platform’s drag and drop feature makes it incredibly user-friendly, making it an excellent option for non-tech savvy individuals. Plus, it’s very affordable to get started.
Pros
- Easy-to-use drag and drop website builder, no coding skills required.
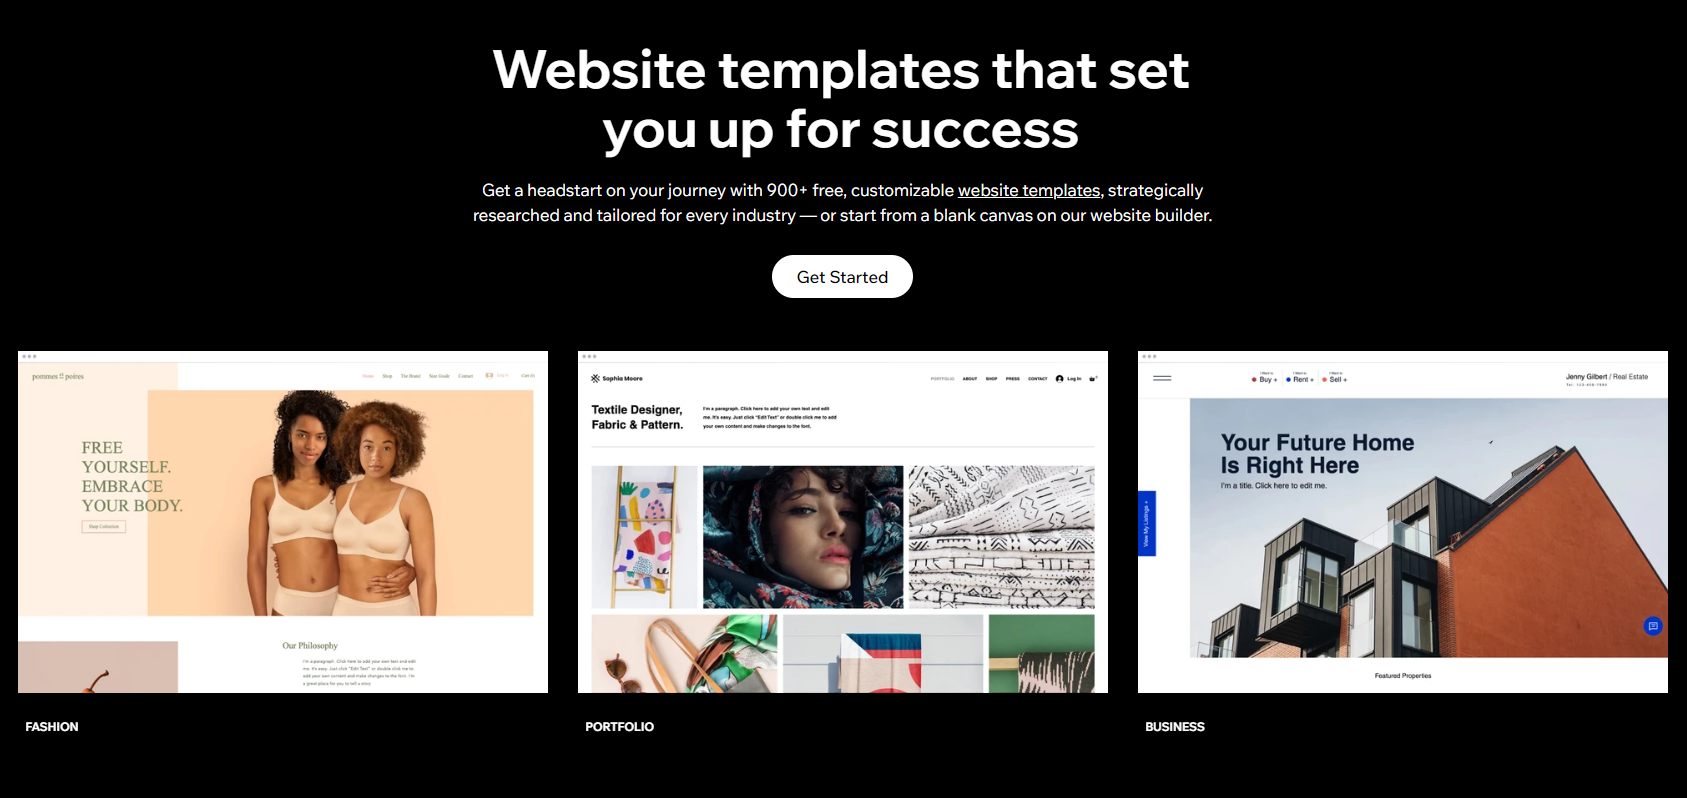
- A wide variety of fully customizable templates for your blog.
- Web.com takes care of all the technical details of hosting your website, providing a hassle-free setup.
- All essential features are included in the affordable starting pricing.
- A free domain is included with all paid plans.
- 24/7 customer support available via phone, live chat, and email.
Cons
- The platform’s ecosystem is relatively small, meaning there aren’t as many third-party plugins as you’d find with WordPress.
- Blogging features are not as robust as those offered by WordPress.
- Since Web.com is a proprietary website builder, switching your website to another platform later may be difficult.
Pricing
Web.com’s pricing starts at a budget-friendly $4.95 per month for the website starter plan, which includes the drag & drop site builder, blogging platform, hundreds of stunning templates, thousands of free stock images, and a free domain.
For powerful SEO tools or eCommerce features, you’ll need to upgrade to the Marketing plan, which starts at $7.95 per month, or their eCommerce plan, starting at $13.95 per month.
However, these prices are exclusive to WPBeginner readers as part of the Web.com coupon deal, and all you need to do to avail these special prices is click on the provided link.
If you’re a small business not inclined to use WordPress, Web.com serves as a sound alternative considering the price and the features you receive.
Wix
Wix is a prominent platform known for its impressive website building capabilities. It’s particularly popular among small businesses for its drag & drop website builder, which provides an easy solution to construct a professional-looking website.
In addition to this, you can add a blog to your website by incorporating the Wix Blog app. Launched in 2006, Wix has steadily grown and now has over 10 million users worldwide.
Pros
- Wix offers a range of templates and third-party add-ons for you to customize your site.
- You can create your site with simple drag and drop tools, no coding or HTML skills required.
- The setup process is quick and straightforward.
Cons
- The free account comes with limitations and includes Wix branding and ads on your site.
- Access to free third-party apps is restricted.
- Once you select a template, you can’t change it.
- Ecommerce features are limited to paid plans, and even those features have limitations.
Pricing
Wix offers a basic website builder for free. With a free Wix account, you’ll get a Wix subdomain that looks something like this: https://username.wixsite.com/example.
Their premium plans, which offer more features, start from $75/month and go up to $150/month.
Gator by HostGator
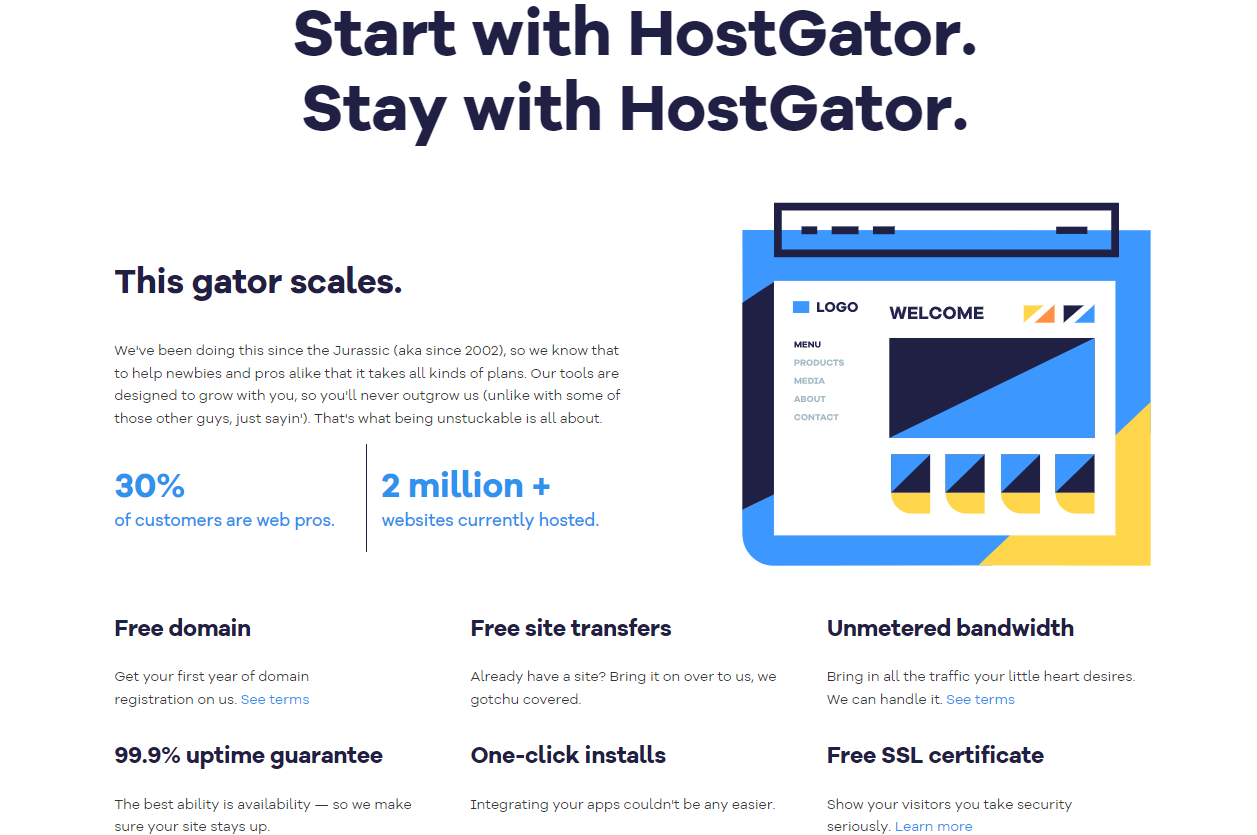
Gator by HostGator is a comprehensive website builder and blogging platform designed for simplicity and convenience. This product is developed by HostGator, a renowned web hosting company, which makes it a solid and reliable choice for bloggers and website owners.
It’s important to note that Gator is separate from HostGator’s hosting service, but it offers an all-in-one solution for those looking for an easy-to-use blogging platform.
With Gator, you can build any type of website, from personal blogs and business sites to online stores, all thanks to its intuitive drag-and-drop tool.
Pros
- Gator comes with an easy-to-use drag and drop builder, letting you customize your blog and website design without any hassle.
- The platform takes care of all the technicalities like backups, performance, and security, freeing you from those worries.
- Every plan comes with a free Domain and SSL certificate.
- You can easily add an online store to your blog with just a few clicks.
Cons
- There’s no free account available, but there’s a 45-day money-back guarantee.
- Ecommerce features are restricted to higher plans only.
- The platform offers a limited number of apps and extensions.
Pricing
The pricing ranges from $11.95/month to $287.64/3 years. You can start with the affordable one and move on to the other ones later.
Blogger
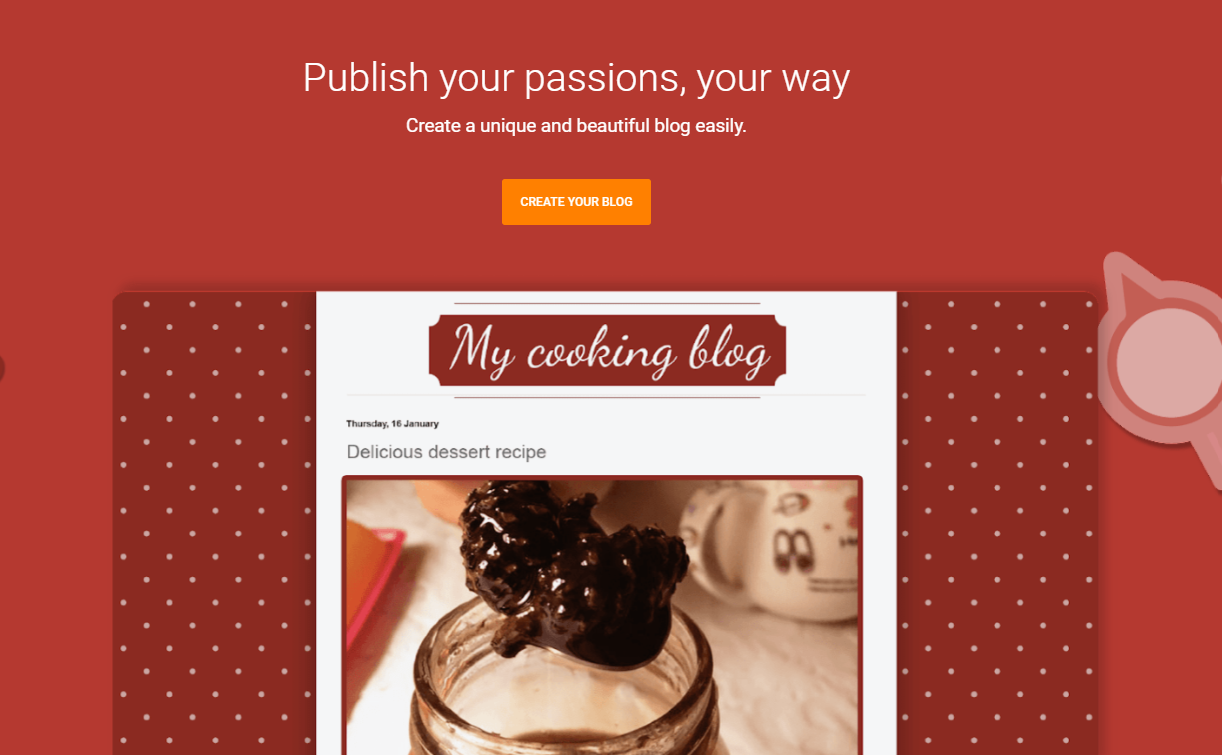
In the world of free blogging platforms, Blogger is a true veteran. Owned by Google, Blogger has been around since the late ’90s and still retains a significant user base today.
Blogger is a straightforward blogging service that allows you to create a blog within minutes and begin sharing your thoughts, ideas, and experiences with the world.
It’s a no-fuss solution that’s excellent for beginners and casual bloggers who don’t need complex features.
Pros
- Blogger is entirely free, and it comes with the reliability of Google’s infrastructure.
- It offers a straightforward interface for writing and publishing posts.
- The platform includes a few simple tools for basic customization.
- Being a Google product, it integrates well with other Google services.
Cons
- The platform is quite basic in terms of features and lacks the flexibility of more modern platforms.
- Customization options are limited, which can be restrictive if you’re looking for a unique design.
- There is no direct customer support for Blogger.
Pricing
One of the main draws of Blogger is its price point — it’s absolutely free. You can create your blog and publish posts without any cost.
However, if you want to have a custom domain, you will need to purchase that separately. Other than that, Blogger doesn’t offer any premium plans or features, so you can blog to your heart’s content without worrying about hitting a paywall.
Tumblr
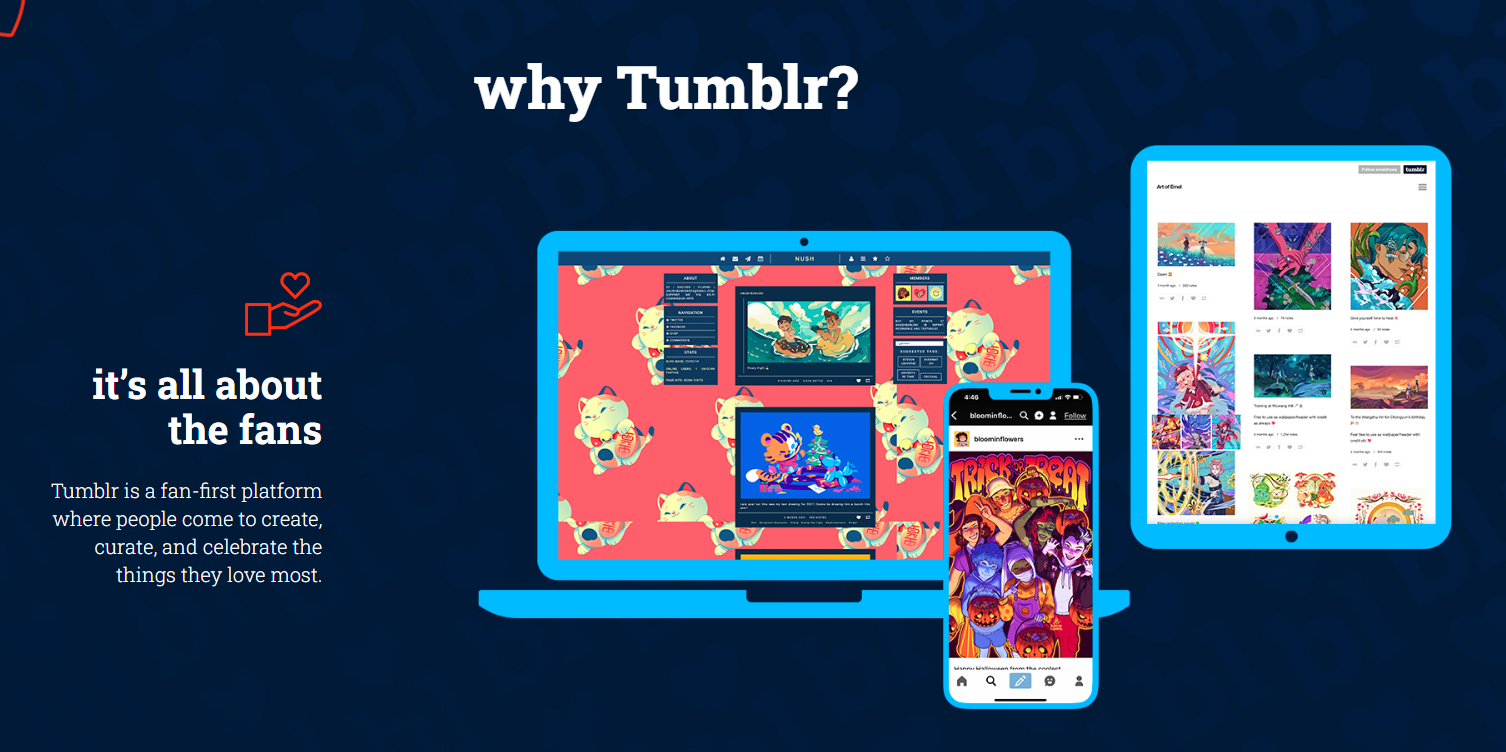
In the world of blogging, Tumblr stands out as a microblogging platform with a twist. It’s more of a community-driven site where people share short-form content, such as quotes, images, videos, and animated GIFs.
This platform is perfect if your blogging plans are not too extensive, and you wish to share ideas, inspiration, and your work quickly and easily.
From personal musings to professional portfolios, Tumblr is the place for creative, free-expression blogging.
Pros
- Tumblr is completely free to use, making it an excellent choice for beginner bloggers.
- It comes with an integrated social media component. It’s designed more as a social network than a traditional blog, which can help drive engagement.
- The platform is very user-friendly. Posting and customizing your blog is quick and easy.
Cons
- It’s not a good fit for long-form content or traditional blogging.
- You’re somewhat limited in terms of design and customization.
- Tumblr doesn’t support a traditional website structure (like pages).
Pricing
One of the most appealing aspects of Tumblr is its pricing structure – it’s absolutely free! You don’t have to worry about hidden costs or expensive upgrades.
You can start and maintain your blog without spending a dime. However, if you want to use a custom domain, you’ll have to purchase it from a domain registrar.
Medium
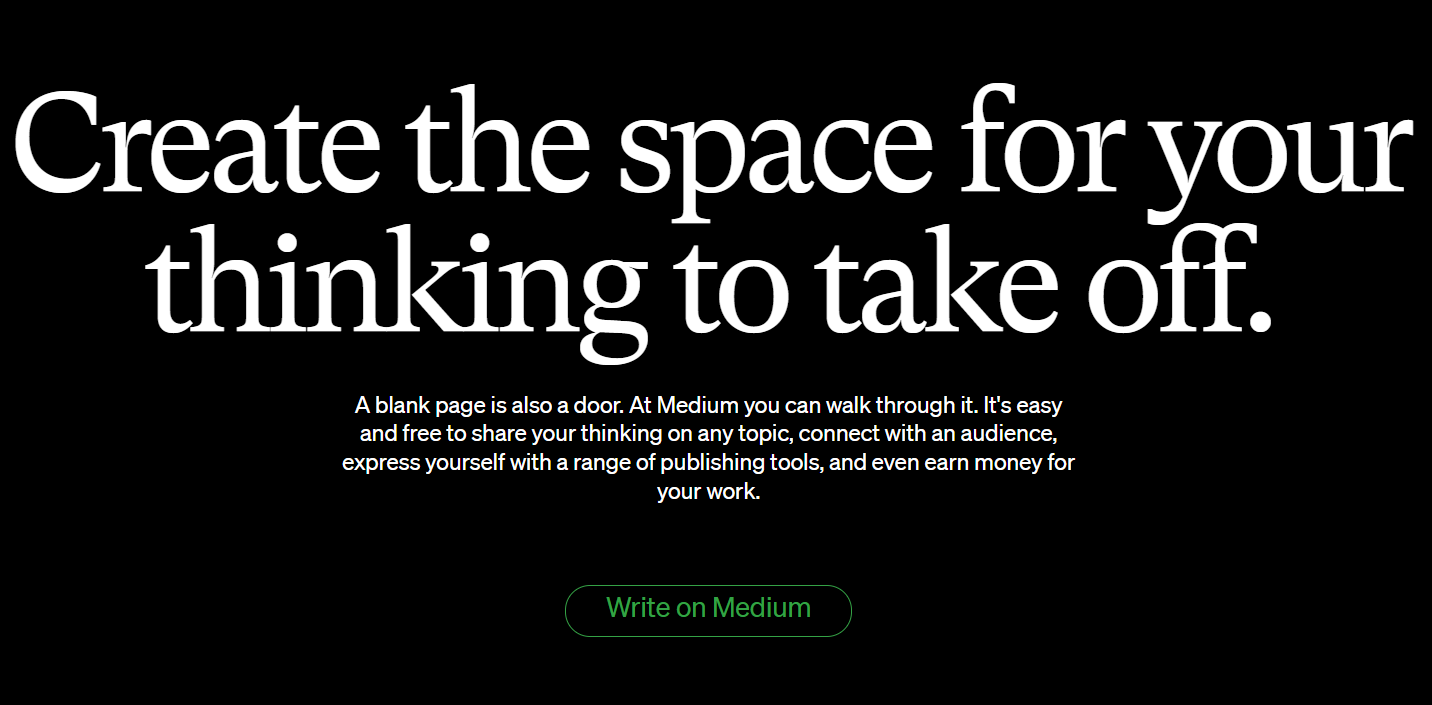
Medium is more than just a blogging platform; it’s a network of ideas and a community of writers. This platform stands out for its focus on quality content and an engaged audience.
Medium is a great place for thoughtful, in-depth posts, and it’s particularly popular with professional writers, journalists, experts, and thought leaders. Its sleek, minimalist design puts the emphasis on your words, and the built-in audience can help get your ideas noticed.
Pros
- Medium’s clean, clutter-free design makes for a distraction-free writing and reading experience.
- It has a built-in audience, making it easier to get your blog posts seen.
- The platform encourages high-quality content and has a community of engaged readers.
- Medium offers built-in analytics to see how your posts are performing.
Cons
- You have limited control over the look and feel of your blog.
- The platform does not support commercial content or affiliate marketing.
- It’s harder to build an independent following as Medium controls distribution.
Pricing
Medium is free to use as a writer. However, if you want to access the premium content as a reader, you’ll need to subscribe to Medium’s membership, which is priced at $5/month or $50/year.
As a writer, you can join Medium’s Partner Program for free and earn money based on how members engage with your content. However, this does not guarantee a stable income and can vary significantly from month to month.
Squarespace
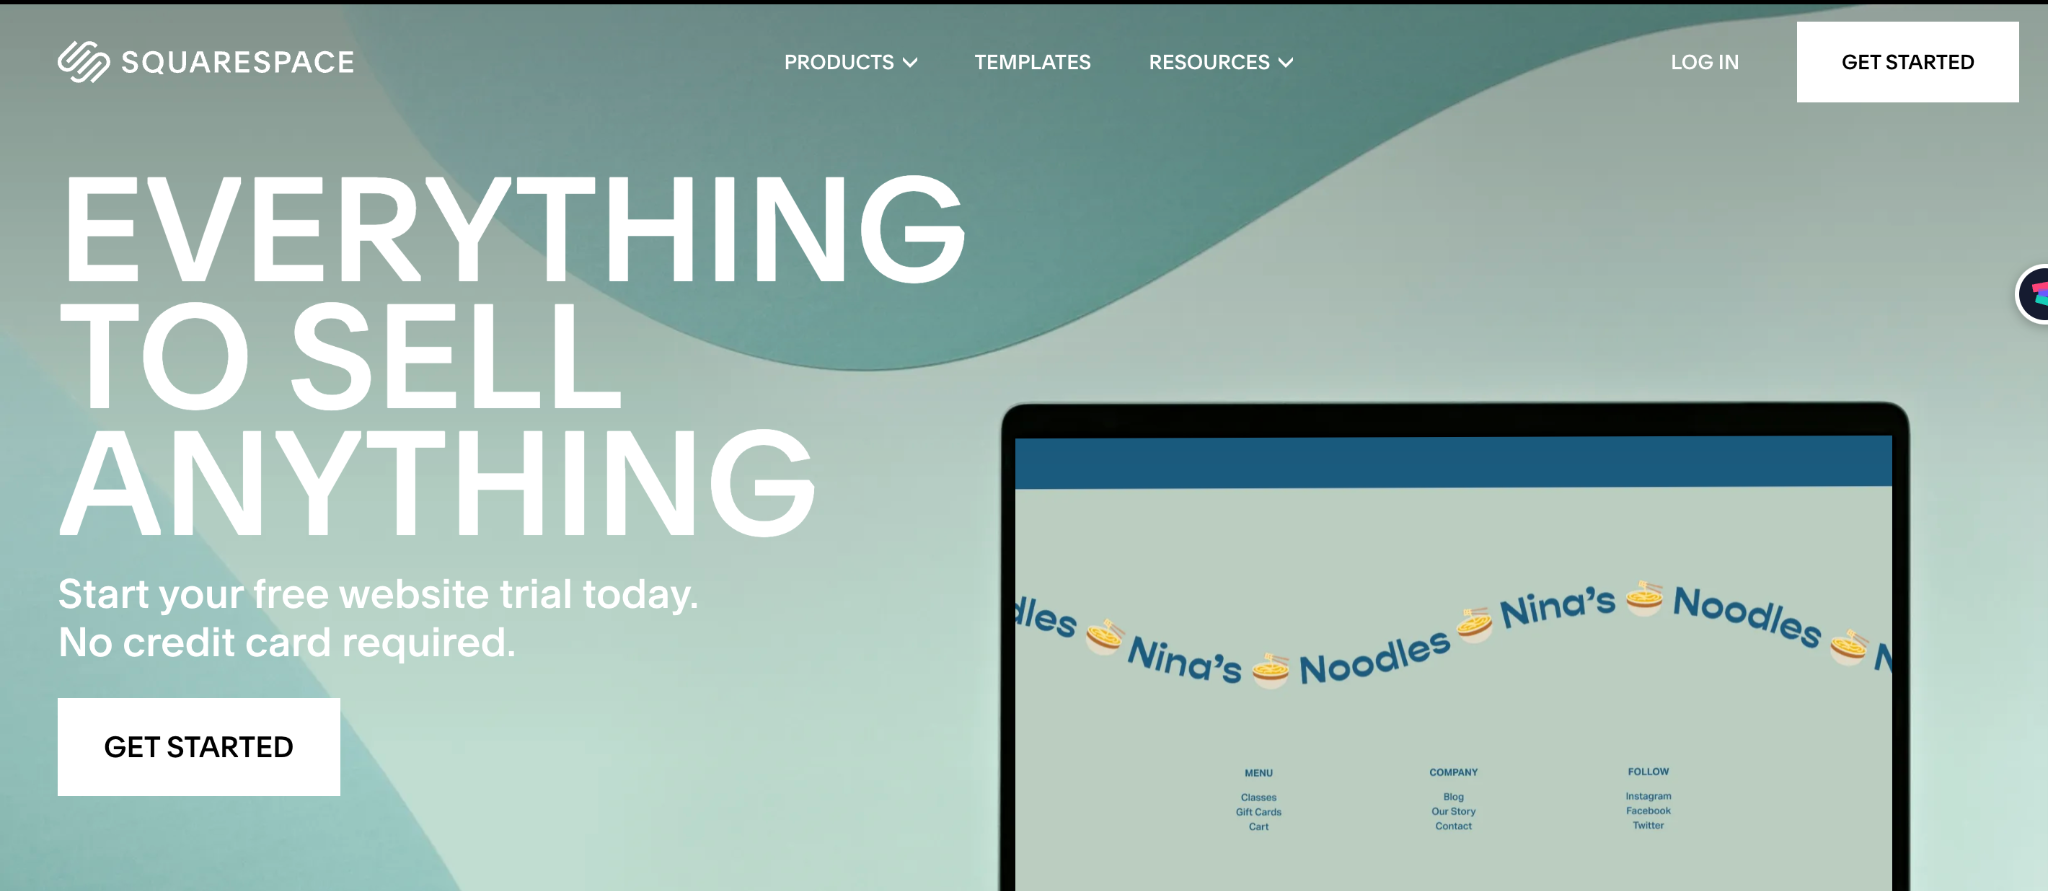
Squarespace is a website builder known for its stunning design templates and top-notch customization features.
The platform is a favorite among creatives like photographers, artists, and bloggers who appreciate the aesthetics. It’s not just about the looks; Squarespace offers comprehensive functionality, including blogging, e-commerce, and more.
The platform is intuitive to use, and you can create a professional-looking blog without knowing a line of code.
Pros
- Squarespace offers a variety of stunning, professionally designed templates.
- It provides comprehensive blogging features, including analytics, categories/tags, drafts, comments, and more.
- The platform is user-friendly with a drag-and-drop interface.
- Squarespace supports e-commerce functionality.
Cons
- Squarespace is relatively pricier than some other platforms.
- The customization features can be overwhelming for beginners.
- Unlike some blogging platforms, Squarespace doesn’t offer a free tier.
Pricing
Squarespace has a range of plans depending on your needs. The personal plan is priced at $16 per month, while the business plan is $23 per month, both billed annually.
The latter includes e-commerce functionality and allows you to accept online payments. However, note that a 3% transaction fee applies on the business plan.
If you’re planning on running a substantial e-commerce operation, Squarespace has specific online store plans starting from $27 per month that waive these transaction fees.
Ghost
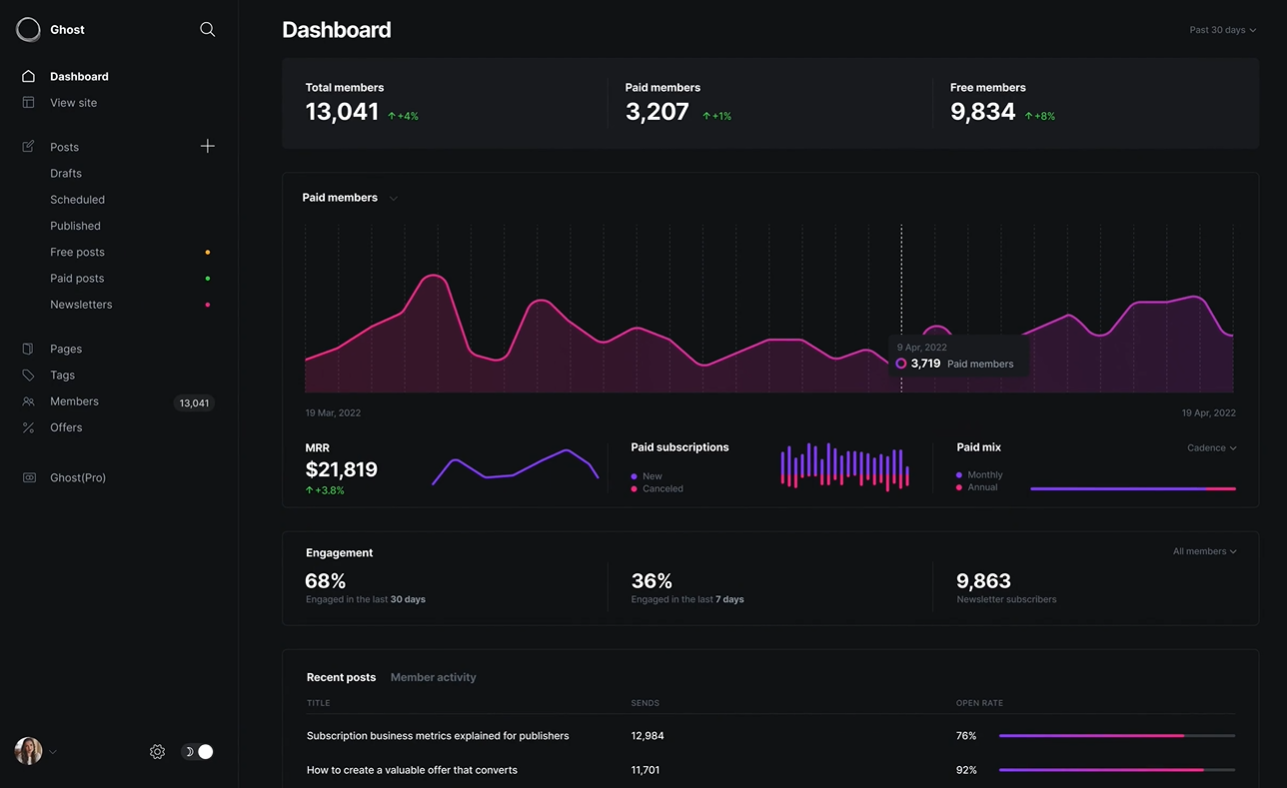
Ghost is an open-source blogging platform designed to simplify the process of online publishing for individual bloggers as well as online publications. This minimalist platform focuses on the core aspects of blogging, keeping clutter to a minimum and making content creation a breeze.
Ghost comes in two flavors: a self-hosted version that you can configure on your server, and a hosted version on Ghost’s own servers.
Pros
- Ghost is highly focused on content creation and is therefore clean and distraction-free.
- The platform is SEO-friendly out of the box.
- It supports integration with popular email newsletters, aiding in audience building.
- Ghost supports modern blogging features, such as the ability to schedule posts and collaborate with your team.
Cons
- The platform can be challenging to set up if you choose the self-hosted version.
- The flexibility and customization options are relatively limited compared to platforms like WordPress.
- Advanced e-commerce features are missing.
Pricing
Ghost has different pricing tiers depending on your needs and the traffic your blog generates.
The Basic plan starts at $9 per month (billed annually), and it includes all the necessary features for a successful blog. The Standard and Business plans, which offer more robust features and increased views per month, are priced at $25 and $199 per month, respectively.
On the other hand, if you prefer the self-hosted version, Ghost is free to download and use, but you’ll need to take care of your hosting environment.
Weebly

Weebly is a versatile website builder that also doubles as a reliable blogging platform. Built with the primary focus on ecommerce, Weebly is a perfect fit for online stores that also want a blog.
It offers an intuitive, drag-and-drop interface, making it easy for anyone to build a visually appealing blog or website without needing to write a line of code.
Pros
- Weebly’s drag-and-drop interface makes blog setup incredibly straightforward.
- It comes integrated with Square for ecommerce, which makes it an excellent choice for online stores.
- Offers a free plan, which is sufficient for basic blogging and small personal websites.
- All Weebly sites come with SSL security.
Cons
- The free plan displays Weebly ads and doesn’t offer a custom domain name.
- The number of available themes and templates is somewhat limited compared to other platforms.
- The platform is not as SEO-friendly as some other blogging platforms.
Pricing
Weebly’s pricing structure is tiered based on your needs. It offers a free plan for basic use, but this comes with Weebly ads and a Weebly subdomain.
The paid plans, ranging from $10 to $26 per month when billed annually, provide additional features like a free domain, removal of Weebly ads, ecommerce features, and advanced site analytics.
Keep in mind, however, that the ecommerce features are only available on the higher-tier plans.
Comparison of Blogging Platforms
Whether you’re an established business looking to connect with your audience on a deeper level, a newbie wanting to carve out a piece of the digital universe, or an aspiring influencer aiming to establish your online presence, we are here for you all.
We’ll break down each platform, delve into their pros and cons, discuss pricing structures, and everything in between. By the end, you’ll have all the knowledge you need to pick the platform that aligns with your goals, so you can start creating, connecting, and converting.
So, let’s dive in and demystify the world of blogging platforms. Trust me; it’s going to be a fun ride!
Our Pick for the Best Blogging Platform
When it comes to our top pick for the best blogging platform, WordPress.org stands head and shoulders above the rest. WordPress.org is an open-source content management system that’s self-hosted.
It’s the ultimate powerhouse in the blogging world, and for good reason. So, let’s delve into why WordPress.org comes out on top.
Why is WordPress.org Our Top Pick?
Firstly, WordPress.org offers unparalleled customization options. With over 60,500 plugins and thousands of themes, it gives you an incredible amount of control over your blog’s design and functionality.
Whether you’re looking to create a minimalist personal blog, an ecommerce powerhouse, or a vibrant community forum, WordPress.org gives you the tools to make it happen.
Plus, WordPress.org is also incredibly SEO-friendly. With robust plugins like Yoast SEO, you can optimize every aspect of your blog to rank higher in search engine results. This gives you a crucial edge in reaching more people and growing your audience.
WordPress.org – A Platform That Grows With You
One of the best parts about WordPress.org is its scalability. You have the freedom to start small and grow your blog at your own pace. As your needs evolve, you can easily add more features, pages, and functionalities.
This makes WordPress.org not just a blogging platform, but a long-term investment for your online presence.
Affordability and Value
While WordPress.org itself is free, you will need to pay for web hosting and a domain name. Despite this cost, the value you get from WordPress.org is hard to beat. It’s a small price to pay for the level of control, customization, and potential growth that WordPress.org offers.
WordPress.org is a highly versatile, scalable, and affordable platform that’s perfect for bloggers of all levels. Its powerful features and immense flexibility make it our top pick for the best blogging platform.
Best WordPress Alternative: Squarespace
If you’re looking for an alternative to WordPress, Squarespace makes a compelling case. Squarespace is a drag-and-drop website builder that’s known for its design-focused templates and user-friendly interface.
It’s a great choice for bloggers who prioritize aesthetics and want a platform that’s simpler to use than WordPress.
Squarespace offers a range of beautiful, modern templates that are optimized for mobile devices. It also includes built-in SEO tools, analytics, and ecommerce capabilities, making it a robust platform for a variety of blogging needs.
The main downside is that Squarespace doesn’t offer as much customization or control as WordPress. It also comes with a higher cost, with prices starting at $12 per month.
Despite these drawbacks, if you value simplicity and design, Squarespace is a worthy WordPress alternative.
Best Free Blogging Platform: Blogger
Blogger stands out as the best free blogging platform. Blogger is a free blog hosting service that’s straightforward and easy to use, making it a great choice for beginners. It provides a secure and reliable platform to start your blogging journey.
Although Blogger offers limited design options and features compared to other platforms, it does come with some useful features. For instance, it provides Google’s robust security, reliability, and it’s simple to monetize with Google AdSense if you’re looking to make money from your blog.
Overall, if you’re after a no-frills, free blogging platform, Blogger is an excellent choice.
Most Used Blogging Platform: WordPress.org
When it comes to usage, WordPress.org is the most widely used blogging platform. WordPress.org is a self-hosted open-source content management system, meaning it takes care of hosting for you.
Its best features include a user-friendly interface, extensive customization through thousands of free and premium themes and plugins, robust SEO tools, and an active community for support. It enables complete control over website design and functionality, supports multi-user management, and allows media-rich content hosting.
Also, it is compatible with various e-commerce solutions. Its flexibility, scalability, and ease of use make it a top choice for individuals and businesses looking to create a unique web presence.
Choosing A Perfect Domain Name For Your Business
Your domain name can be a game-changer. It’s your brand’s digital billboard. Now, we’ll navigate the art of choosing the perfect domain name, ensuring your online identity isn’t just good, but great.
Get ready to build your success online!
The 10-Step Process To Choosing an Effective Domain Name
The perfect domain name can set you up for success.
Let’s explore a 10-step, foolproof process to select a domain name that resonates with your brand, draws in audiences, and positions you for online triumph. It’s time to amplify your digital footprint. Let’s dive in!
Making It Easy to Type
The first step to choosing an effective domain name is to ensure it’s easy to type. You want your users to reach your website without any hassle.
Avoiding slang terms or words with multiple spellings can help to achieve this. For instance, using ‘you’ instead of ‘u’ or choosing ‘express’ over ‘xpress’ helps prevent confusion and makes your site easier to find.
Essentially, the simpler and more straightforward your domain name, the better. A user-friendly domain name reduces the likelihood of typos and can improve the chance of users landing on your site, hence improving your site’s traffic and potential for online success.
Keeping It Short
The second step in choosing an effective domain name involves keeping it short. Short domain names are not only easier to remember, but they also reduce the risk of typos or misspellings that could lead your customers astray.
Imagine having to type out a long, complex URL — it can be frustrating, right?
A short domain name provides a smoother user experience. For example, consider ‘Books.com’ over ‘BuyYourFavoriteBooksHere.com’.
The former is short, precise, and far more user-friendly. So, while creating your domain name, remember: brevity is key. This not only enhances memorability but also the accessibility of your site, aiding in brand recall and customer loyalty.

Using Keywords
The third step in choosing an effective domain name involves using keywords. Keywords are words or phrases that describe your business and the services you offer.
They play a critical role in improving your website’s SEO, which helps boost your site’s visibility on search engine results pages (SERPs).
For instance, if you run a bakery, you might want to include terms such as ‘bakery’, ‘cakes’, or ‘pastries’ in your domain name. Doing this can help users understand what your business is about at a glance and can make your website more likely to show up when users search for these terms.
For example, ‘FreshBakery.com’ or ‘TastyPastries.com’ could be good choices.
Using a domain name generator can also be beneficial here. These tools can provide domain suggestions that include your keywords, helping you find a name that’s available and fits your business.
Remember, incorporating relevant keywords in your domain can increase traffic and make your website easily recognizable to your customers.
Targeting Your Niche
The fourth step in choosing an effective domain name is targeting your niche. If your business primarily serves a local area or region, it can be highly beneficial to include your city, state, or region in your domain name.
For example, if you run a bakery in Boston, a domain name like ‘BostonFreshBakery.com’ would be highly effective. This approach helps local customers easily associate your business with their location, making it more memorable and easy to find.
Furthermore, it can improve local search engine optimization, increasing the likelihood that your business will appear in search results when potential customers are looking for local options.
Geographic domain extensions, like .boston or .vegas, can also be used to represent your area in your domain. By targeting your area in your domain name, you increase your relevance to a local audience and improve your chances of being found by customers in your vicinity.
Avoiding Numbers and Hyphens
The fifth step in choosing an effective domain name involves avoiding numbers and hyphens. Although these might seem like a good way to get a unique domain name, they often lead to more confusion than they’re worth.
Numbers can be problematic because when someone hears your website address, they won’t know whether they should spell out the number or use the numeral. For example, if your domain name is ‘FiveStarBakery.com’, people might type ‘5StarBakery.com’ instead.
Hyphens, on the other hand, can easily be forgotten or misplaced. A domain name like ‘fresh-bakery.com’ might end up being typed as ‘freshbakery.com’.
If you feel that numbers or hyphens are an essential part of your brand name and need to be included in your domain, it’s a good idea to register different variations of your domain to ensure you don’t miss out on potential traffic.
However, as a general rule, a clean, clear, and hyphen-free domain name is your best bet for ensuring easy accessibility to your site.
Being Memorable
The sixth step in choosing an effective domain name is ensuring it’s memorable. With millions of registered domain names out there, it’s crucial to select a domain name that sticks in the minds of your customers.
Your domain name is a significant part of your brand’s identity and it’s often the first point of contact for online customers. Hence, it needs to be catchy, unique, and reflective of what your business offers.
Consider how the name sounds, if it’s catchy, and if it conveys the essence of your brand. Does it have a nice ring to it? Is it distinct enough to stand out in a sea of domain names? These are important questions to ask.
Sharing your domain name idea with close friends and family can also be beneficial. They can provide valuable feedback about its appeal and whether it makes sense to them. If it’s easily recalled and well understood, you’ve likely chosen a winner.
Ultimately, a memorable domain name enhances brand recall, makes a stronger impression on users, and can lead to increased customer engagement and loyalty.
Researching It
The seventh step in choosing an effective domain name is conducting thorough research. It’s crucial to ensure that the domain name you’ve selected isn’t trademarked, copyrighted, or being used by another company.
Failure to do so could lead you into a legal mess that could cost you a lot of money and possibly even your domain.
Use online tools to check if your chosen domain name, or a similar version, has already been registered. Check databases like the U.S. Patent and Trademark Office to see if your domain name is similar to any registered or pending trademarks.
It’s also a good idea to research the value of your possible domain. Some domain names may have higher value in the resale market, which could be advantageous down the line. Resources like GoDaddy Domain Appraisals can help you determine the value of your domain name.
Doing comprehensive research on your potential domain name protects you legally, assures its uniqueness, and gives you an understanding of its worth in the digital market.

Choosing a Fitting Domain Name Extension
The eighth step in choosing an effective domain name is selecting the right domain extension. Domain extensions are the suffixes at the end of web addresses, such as .com, .net, .org, etc. They play a significant role in defining the identity of your site.
While .com is the most popular and widely accepted, it can sometimes be challenging to find a short and memorable .com domain name due to its widespread use. In such cases, there’s a host of new generic top-level domains (gTLDs) like .io, .co, .ai, .me, .xyz that can be explored.
Each domain extension has a specific use. For instance, .co often stands for company or commerce, .info is usually used for informational sites, .net is associated with tech or internet infrastructure sites, .org is usually for non-commercial organizations and nonprofits, and .biz is used for business or commercial use.
Choosing the right domain extension can help communicate what your website is about to your visitors even before they visit it. However, remember to forward any additional domains to your primary website if you decide to secure more than one domain extension for your business.
Protecting and Building Your Brand
The ninth step in choosing an effective domain name is to protect and build your brand. Once you’ve chosen the perfect domain name, it’s essential to secure it by purchasing various domain extensions, as well as misspelled versions of your domain name.
This practice has two major advantages. Firstly, it prevents competitors from registering other versions of your domain name, thereby safeguarding your brand image online. Secondly, it ensures your customers are directed to your website, even if they mistype your domain name in the address bar.
By purchasing domain names similar to your primary domain, you effectively build a protective barrier around your brand.
This method ensures that your brand identity remains distinct and undiluted, and it steers your audience towards your official site, no matter what. It’s an investment in your brand’s online reputation and visibility.
Acting Fast
The final step in choosing an effective domain name is acting quickly. Domain names are unique and, because of this, they sell quickly. There’s nothing more disappointing than finding the perfect domain name for your brand, only to discover that it’s already been taken because you waited too long to register it.
Once you’ve done all the research and have settled on the perfect name that’s memorable, brandable, and easy to type, you should immediately register it. Many domain names are relatively inexpensive, making it an easy decision to secure your chosen name promptly.
Quick action not only ensures you secure your perfect domain name, but it also allows you to establish your online presence and start building your brand sooner. So, when you find that perfect domain name, don’t hesitate – register it as soon as possible.
How To Buy A Domain on Hostinger?
Let’s go through these steps with Hostinger in mind on how to purchase a domain.
- Choose a Reliable Domain Registrar: Hostinger is a well-regarded domain registrar and web hosting provider, making it a reliable choice for purchasing your domain. Head over to their website to start the process.
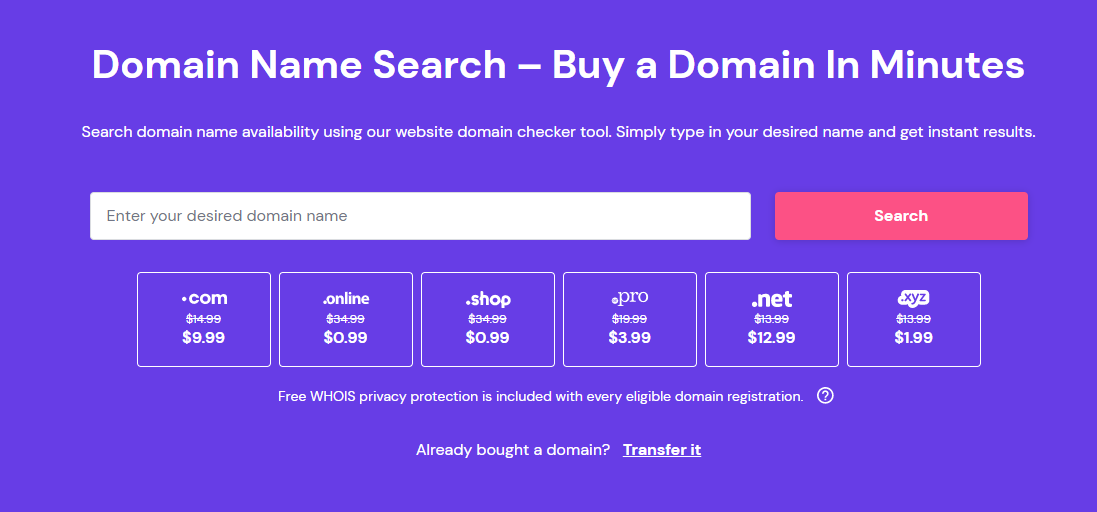
- Run a Domain Name Search: On Hostinger’s website, you will find a domain name search tool. This tool will help you check if the domain name you want is available or if it is already taken. You should think of a domain name that represents your brand or the content you are going to put up on your website. Try to keep it simple, easy to remember, and short. Once you’ve entered your desired name, the tool will show you whether it’s available or not. If it is, you can proceed to the next step. If not, you’ll need to brainstorm some new ideas.
- Purchase Your Domain: After finding a suitable and available domain name, proceed to purchase it. You can do this by adding the domain to your cart and proceeding to checkout. At this point, you can also choose the duration for which you want to register the domain. This can be anywhere from one year to several years. Remember, you will have to renew your domain registration when it expires, so consider a length of time that works for you.
- Enter Your Contact Details: As part of the checkout process, you will need to provide contact details. This will include your name, email address, and physical address. This information is needed for the WHOIS database, a public database that lists who owns what domain. Some registrars offer domain privacy services that keep this information private, so look out for this option if privacy is a concern for you.
- Verify Domain Name Ownership: After completing the purchase, you will receive an email to verify your domain name ownership. This is a standard process and ensures that the email address provided is valid and you have access to it. Click the verification link in the email to confirm your ownership.
- Protect Your Domain: Finally, consider additional ways to protect your domain. This might involve setting up two-factor authentication, regularly changing your login password, or buying domain privacy protection, if not already included with your purchase. Hostinger offers several security features that can help protect your domain, so explore these options and decide what suits your needs best.
That’s it! Once you’ve followed all these steps, you’re the proud owner of a new domain name.
Selecting The Ideal Web Hosting Provider
Choosing a web hosting service is much like choosing a home for your website – get it wrong, and you’re in for a world of headaches.
With plenty of hosting services fighting for your attention, it’s easy to feel lost in the shuffle. That’s why I’m here to help you navigate the landscape of web hosting with a focus on one particular provider – Hostinger.
We’ll pull back the curtain on Hostinger’s varied hosting plans, zero in on the suitable clientele for each, and arm you with crucial tips to make an informed decision. Let’s dive in!
Hostinger’s Web Hosting Plans
Navigating the world of web hosting can feel like a maze, with twists and turns at every corner. But, don’t worry! We’ve got your back.
Today, we’re going to deep-dive into Hostinger’s web hosting plans – a provider that’s been making waves in the industry. From shared to VPS hosting, and from specialized CMS plans to Minecraft server hosting, Hostinger has an array of offerings designed to fit every need.
But, how do you pick the right one for you? In this guide, we’ll take you through the ins and outs of Hostinger’s hosting plans. Buckle up and let’s get started!
Overview of Hostinger’s hosting plans
Hostinger is a well-regarded web hosting provider known for its vast array of hosting plans catering to different needs. Let’s take a closer look at each of these offerings:
Shared Hosting:
Shared hosting, as provided by Hostinger, offers an array of features tailored for those looking to set up their website quickly and efficiently. With this plan, you get access to a free website builder, empowering you to create a professional-looking site without the need for coding expertise. It also includes a powerful yet user-friendly control panel, which streamlines the management of your website.
A significant advantage of Hostinger’s shared hosting plan is the inclusion of popular CMS (Content Management Systems) like WordPress, Joomla, and Drupal. This feature simplifies the process of building and managing your website’s content. Additionally, Hostinger provides a free SSL certificate, ensuring that your website is secure and trustworthy to your visitors.
One of the key commitments that Hostinger makes is a 99.9% uptime guarantee. This means that your website will be accessible to visitors virtually all the time, minimizing the potential loss of traffic due to server downtime.
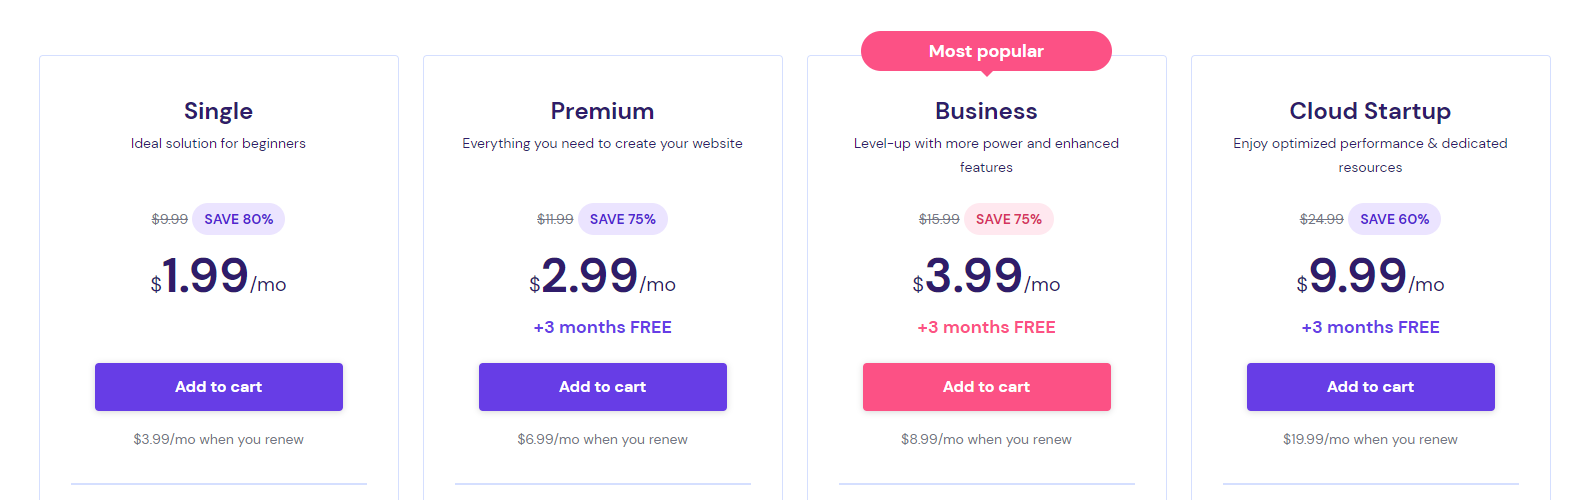
Pricing:
Hostinger’s shared hosting plan is very economical, starting at just $2 per month. This price point makes it one of the most affordable plans offered by Hostinger. Do note that the exact pricing may vary slightly depending on your specific needs and any ongoing promotions.
Who is this plan suitable for?
Shared hosting is an excellent fit for beginners, small business owners, and bloggers. This type of hosting plan is ideal if you’re planning to host a single, low-traffic website. Its affordability and ease-of-use make it a popular choice for those who are new to web hosting or are operating under a tight budget.
Remember, while shared hosting offers a cost-effective solution, it involves sharing server resources with other websites. Therefore, if your site grows significantly in size and traffic, you might want to consider upgrading to a more robust hosting plan such as VPS or cloud hosting.
Agency Hosting:
Hostinger’s Agency hosting plan is a robust, feature-rich option designed to cater to the unique needs of agencies. The package is comprehensive, offering a multitude of resources that make managing multiple client websites more straightforward and efficient.
The plan includes a powerful control panel that gives you an easy-to-use interface for managing your websites. The panel allows you to easily monitor resource usage, manage your clients’ accounts, and make any necessary adjustments.
With Agency hosting, you can host multiple websites without worrying about server performance. The plan offers plenty of resources to ensure each of your client’s websites performs optimally, regardless of traffic spikes.
The Agency hosting plan also includes unlimited bandwidth and SSD storage, meaning you won’t have to worry about storage or data transfer limits. This is especially beneficial for agencies that deal with websites having heavy traffic or large media files.
Pricing:
The Agency hosting plan is more expensive than shared hosting due to the increased resources and capabilities it offers. However, Hostinger aims to provide affordable solutions, so you can expect a competitive price for this high-end plan. Unfortunately, as of my knowledge cutoff in September 2021, I don’t have the exact pricing details for the Agency hosting plan.
Who is this plan suitable for?
The Agency hosting plan is specifically designed for web agencies that manage multiple client websites. This package is perfect if you’re running an agency and require advanced features to manage and maintain several sites simultaneously.
However, it’s not just agencies that can benefit from this plan. If you’re a freelancer or a professional managing multiple personal projects or websites, this plan offers the resources and flexibility to keep all your sites performing well.
It’s important to note that while Agency hosting provides more resources and capacity than shared hosting, you may need to consider VPS or dedicated hosting solutions if your websites require even more resources.
Cloud Hosting:
Hostinger’s Cloud Hosting is a powerful and easy-to-use plan that provides the resources necessary for hosting large online stores or resource-intensive projects. It offers an upgrade over shared hosting in terms of performance, reliability, and scalability.
Cloud hosting is known for its performance and resilience. It uses multiple servers to host your website, which reduces downtime and improves site speed. If one server fails, your website will continue to operate from another server, ensuring uninterrupted service.

It also allows you to scale your resources instantly in response to traffic spikes or increased demand. So if your website suddenly gets a lot of visitors, you can quickly add more resources to prevent your site from slowing down or crashing.
Pricing:
As for pricing, Hostinger’s Cloud Hosting plans are more expensive than shared hosting due to the significant increase in resources and performance capabilities it offers. It costs around $10-$200 per month.
Who is this plan suitable for?
Cloud hosting is a great fit for large online stores or other resource-intensive projects. It’s ideal for websites that experience high traffic or sudden traffic spikes, as it allows for immediate resource scaling.
It’s also a good fit for businesses that prioritize reliability and uptime, as the multi-server setup of cloud hosting reduces the risk of site downtime. If your website is critical to your business and can’t afford any downtime, cloud hosting could be an excellent choice.
While it is an excellent option for many businesses, it might not be necessary for small websites or blogs that don’t generate high traffic or require extensive resources.
WordPress Hosting:
Hostinger’s WordPress hosting is tailor-made to ensure maximum performance and optimization for WordPress sites. The servers for these plans are configured specifically for WordPress, enhancing speed and performance.
The WordPress hosting plans include easy WordPress installation, automated updates, and additional features that aid in WordPress performance optimization. It also comes with specific security measures tailored for WordPress, making it a secure platform for WordPress websites.
Moreover, Hostinger’s WordPress hosting plans also include 24/7 WordPress support, ensuring expert help is available whenever you need it.
Pricing:
The pricing for Hostinger’s WordPress hosting plans can vary based on the specific features and resources provided. These plans often include different tiers, allowing you to choose one that best suits your website’s requirements and your budget. It can cost around $70 per month.
Who is this plan suitable for?
This plan is specifically designed for anyone who uses WordPress, whether they’re beginners starting a personal blog, or businesses looking to establish a strong online presence.
WordPress hosting can be a perfect fit for those who want an easy-to-use, powerful platform to create a website or blog and prefer a hosting environment optimized for WordPress. It’s particularly useful for those who aren’t tech-savvy, as many of the technical aspects of managing a WordPress website are taken care of by the host.
However, if you’re not planning on using WordPress or have advanced server management skills and require greater control, other hosting plans might be a better fit.
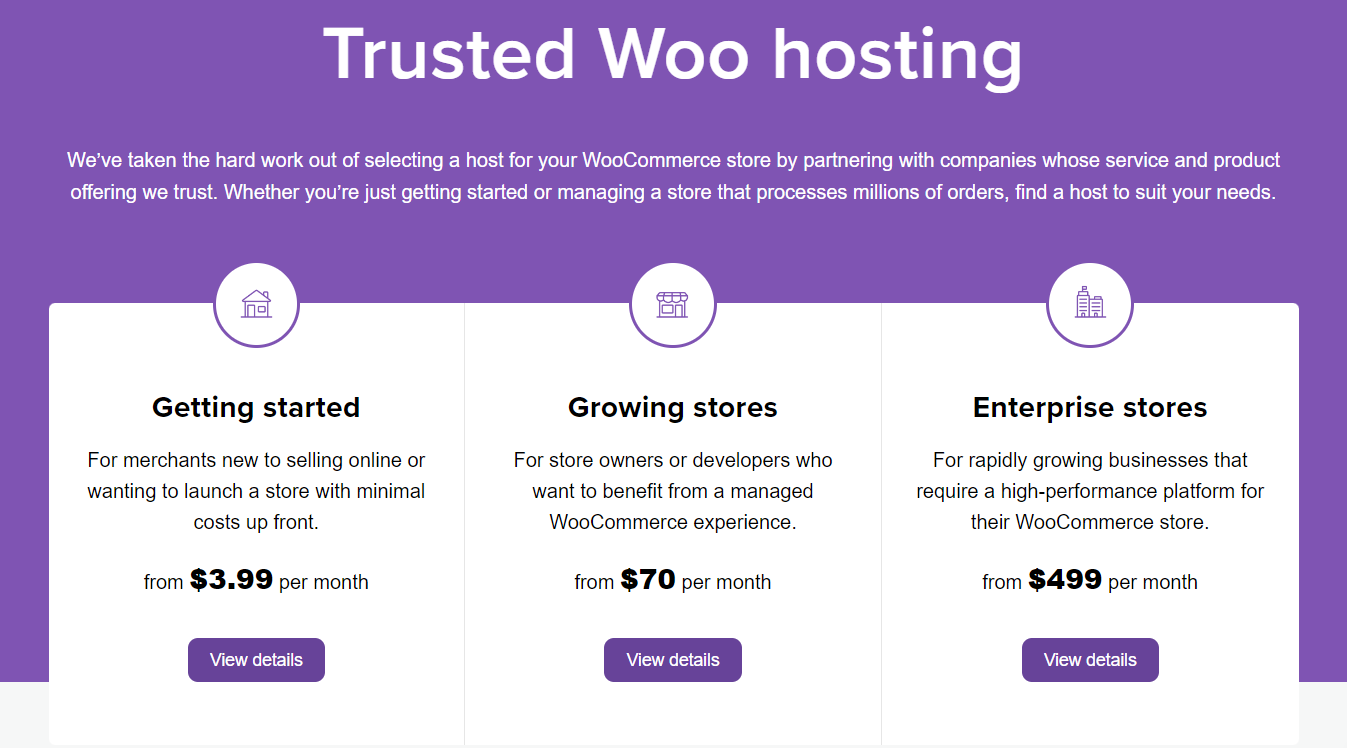
WooCommerce Hosting:
Hostinger’s WooCommerce hosting offers a custom server setup tailored to provide fast and responsive eCommerce sites. This hosting package is ideal for businesses looking to set up an online store on the WordPress platform, as WooCommerce is a powerful WordPress plugin designed for eCommerce.
With Hostinger’s WooCommerce hosting, you’ll get a platform that is optimized for the WooCommerce plugin, ensuring the best possible performance. These plans usually come with SSL certificates for secure transactions, automatic updates for WordPress and WooCommerce, and dedicated customer support.
Pricing:
Typically, the pricing structure will vary based on the resources and features included in the package. It’s best to visit Hostinger’s official website for the most accurate and up-to-date pricing information. It starts from $2.89 which ia an affordable price to pay for.
Who is this plan suitable for?
WooCommerce hosting is great for small to medium-sized online stores that intend to use WordPress and WooCommerce for their eCommerce operations. This plan is specifically designed to support the technical requirements of WooCommerce, so it’s ideal for business owners looking for a simplified, optimized hosting experience.
However, if you plan to use a different eCommerce platform or your online store is expected to grow rapidly and require more resources, you might want to consider other hosting options like VPS or cloud hosting.
VPS Hosting:
Virtual Private Server (VPS) hosting offered by Hostinger delivers flexibility and reliability to its users. It provides a private, isolated environment where you have dedicated resources such as disk space, CPU, and RAM. The major advantage of VPS hosting is that it allows full control of the system, enabling users to build and manage their projects according to their unique needs.
Hostinger’s VPS hosting also comes with full root access. This means that users have the freedom to install any software they need and make any necessary server configurations. This is a highly valued feature for developers and system administrators.
Pricing:
The cost usually varies depending on the number of resources (CPU, RAM, storage) included in the plan. It starts from $3.99month and ranges up to $77.99/month.
Who is this plan suitable for?
VPS hosting is a perfect choice for technical experts and businesses with considerable online projects that require complete management freedom. It’s an excellent fit for developers who need to set up custom environments or businesses with high-traffic websites that demand more resources than shared hosting can provide.
In addition, it can serve well for advanced programmers and people with knowledge of LiteSpeed web servers, as they can fully utilize the control and capabilities offered by VPS hosting. However, it might not be the best choice for beginners due to the technical knowledge required to manage a VPS.
CyberPanel VPS Hosting:
CyberPanel VPS Hosting is a powerful solution that incorporates the use of CyberPanel, a lightweight, fast, and robust control panel powered by OpenLiteSpeed. This hosting plan offers the benefits of speed, performance, and ease of use to users, which makes it a preferred option for developers who want to maximize their productivity.
With CyberPanel VPS Hosting, you can enjoy the luxury of having dedicated resources, which include CPU, RAM, and storage. This ensures optimal performance and control over your website. Furthermore, it allows users to take full advantage of LiteSpeed’s caching technology, which accelerates the speed of your websites.
CyberPanel comes with an intuitive user interface that simplifies server management. It includes an auto-installer, letting you deploy WordPress, Joomla, PrestaShop, and more with just a click. With full root access, you can freely modify your server environment as your project evolves.
Pricing:
Hostinger’s CyberPanel VPS Hosting starts at $9.99/month. The pricing is structured to accommodate a wide range of users, from beginners to experienced developers. Upgrades are available if your project or business needs more resources or capabilities.
Who is this plan suitable for?
CyberPanel VPS Hosting is an excellent choice for:
- New developers who want to create advanced projects with ease.
- Users who have a website with medium-to-high traffic.
- Individuals who require full control over their hosting environment.
- Advanced programmers and developers familiar with LiteSpeed technology.
- Webmasters who prioritize website speed and performance.
Whether you’re a developer or an individual who requires a seamless, high-performing, and easy-to-use hosting solution, CyberPanel VPS Hosting could be an ideal fit for your needs.
Minecraft Hosting:
Minecraft Server Hosting by Hostinger is an easy-to-manage and robust solution for setting up your own Minecraft server. This service is built on VPS with KVM virtualization, ensuring dedicated resources for your server at all times, which results in smoother gameplay and better in-game experiences.
Hostinger’s Minecraft Server Hosting employs the Game Panel, which simplifies the process of setting up and managing the server. This feature allows users to easily enable or disable pre-installed mods. Additionally, you also get full root access to install any additional mods or plugins to enhance your gaming experience.
This hosting solution has servers located in the United States, the Netherlands, and Lithuania. Changing the server location is straightforward with the help of Hostinger’s Customer Success team, ensuring optimal performance and minimal latency for your Minecraft gameplay.
Pricing
Hostinger’s Minecraft Server Hosting starts at a competitive price of $6.99/month. It’s designed to be affordable while still offering all the features and resources needed for a smooth and engaging gaming experience. Upgrades to higher-tier plans are also available at any time to suit the expanding needs of your Minecraft community.
Who is this plan suitable for?
Minecraft Server Hosting is perfect for:
- Minecraft enthusiasts who want to host their own private servers for friends and communities.
- Gamers who prefer having control over the game environment and mods.
- Gaming communities seeking a reliable and easy-to-set-up platform for their multiplayer gaming sessions.
If you’re a Minecraft player looking for a reliable, flexible, and scalable server hosting solution, Hostinger’s Minecraft Server Hosting is a great option to consider.
With Hostinger, each plan is designed with different users in mind, ensuring that everyone from novices to experienced developers can find the perfect hosting solution for their needs.
Five Crucial Factors To Consider When Choosing A Hosting Plan
Choosing the right hosting plan is vital for online success, and these five crucial factors will guide you towards making an informed decision.
Understanding Your Website’s Requirements
Understanding your website’s requirements is a crucial step before deciding on a hosting plan. This involves taking into account several key aspects related to your website, such as its type, scale, traffic volume, and the technology it uses.
Here’s a more detailed breakdown:
- Type of Website: The kind of website you aim to build significantly influences your hosting needs. For instance, a simple blog has different requirements than an eCommerce store. A blog might do just fine with a shared hosting plan, while an online store usually benefits from a more robust solution like VPS or dedicated hosting, which offer higher performance and enhanced security features.
- Website Scale and Traffic Volume: If you’re starting a small blog or a personal website, a basic hosting plan might suffice. But if you’re planning to host a high-traffic website or an online business that you expect to grow rapidly, you’d want a hosting plan that can handle significant traffic volumes and provide scalability to adjust to your growing needs.
- Storage and Bandwidth Needs: The amount of data your website will handle directly impacts the storage and bandwidth you’ll require. If your site will feature lots of high-quality images, videos, or extensive databases, you’d need a hosting plan that offers ample storage. Similarly, high-traffic websites require more bandwidth to ensure a smooth user experience.
- Technology Requirements: The technology your website uses can also affect your choice of hosting. If you’re using a particular CMS (like WordPress or Joomla), you might benefit from hosting plans optimized for that platform. Similarly, if you’re planning to use specific programming languages like Python or Composer, a VPS would be a better choice as it gives you full control over the server environment.
Website-Building Options and CMS
Website-building options and content management systems (CMS) are key considerations when building a website. Depending on your skills, you might choose to code your website from scratch or use a website builder, which offers drag-and-drop functionality for creating your website.
A CMS, on the other hand, is an application that allows you to create and manage digital content without extensive coding knowledge. It provides a more structured, user-friendly way to manage your website’s content and layout.
Popular CMSs include WordPress, Joomla, Drupal, and PrestaShop, each offering unique features suitable for different types of websites. For instance, WordPress is favored for its user-friendly interface and extensive plugin ecosystem, making it suitable for blogs and small-to-midsize business websites.
When selecting a hosting plan, ensure it supports your chosen CMS or website-building platform. Hostinger, for instance, provides CMS-specific hosting plans, making it easy to get the most out of your chosen platform.
Server Locations
The location of your server plays a critical role in your website’s performance and user experience. Essentially, the physical distance between your server and your users can impact how quickly your website loads.
The closer your server is to your users, the less time it takes for data to travel, leading to faster load times and a more seamless browsing experience.
Choosing a hosting provider with servers located near your target audience can drastically improve your site’s speed. For instance, if your primary user base is in Europe, having your server located in the same region would be beneficial.
Hostinger offers an advantage in this regard, as it has servers in seven key regions across the world – the United States, the United Kingdom, Brazil, the Netherlands, Singapore, India, and Lithuania. This allows you to select a server location that’s closest to your user base, thereby optimizing your website’s performance.
Level of Support
When it comes to web hosting, the level of support provided by your hosting company is an essential factor to consider. The reality of managing a website is that, at some point, you’ll likely encounter issues or challenges that require professional help.
It might be a sudden spike in traffic that crashes your site, a cybersecurity threat, or an unexpected technical glitch that hampers functionality.
In these moments, a responsive and knowledgeable support team is invaluable. The swiftness with which they can identify and resolve your problem could mean the difference between a brief hiccup and extended downtime that costs you visitors or sales.
Hostinger recognizes the importance of reliable customer support, offering 24/7 assistance via email and live chat.
The company also provides varying levels of support depending on whether you opt for a managed hosting plan, where hosting issues are fully addressed by the team, or an unmanaged VPS plan, where users have more autonomy and support is more limited.
This flexibility allows you to choose a level of support that best matches your technical abilities and needs.
Backup Options
In today’s digital world, data is incredibly valuable. Whether it’s your website’s content, customer data, or the intricacies of your site’s design and functionality, losing your data can be a significant setback.
Consequently, it’s critical to consider backup options when selecting a web hosting plan.
A web hosting company should provide quality backup services, allowing you to recover your website data if it’s compromised or lost. Backups can also be a lifesaver in the event of a cyber attack or accidental data deletion.
Hostinger, for instance, provides weekly backups for the last seven weeks and daily backups for the previous seven days, offering an extra layer of data security.
With the help of hPanel, you can backup both your website files and databases. This comprehensive backup strategy ensures that, even if the worst happens, you’ll be able to restore your website and continue serving your customers or readers with minimal disruption.
A Comprehensive Guide to WordPress Installation
The real beauty of WordPress is not just its vast user base, but how it makes website building accessible to everyone – from bloggers, to business owners, to big brands, to absolute beginners.
The problem is, while WordPress is designed to be user-friendly, the installation process can seem a bit daunting for novices. Maybe you’ve even tried to install WordPress before and run into a wall of confusion. But that’s okay. We’ve all been there.
Now we’ll dive deep into common installation problems you may face and, of course, how to troubleshoot them. Because, let’s face it, technical glitches can happen, but they shouldn’t keep you from creating your fantastic website.
So, are you ready to embark on your WordPress journey? Let’s get started!
Installing WordPress On Hostinger
Going into WordPress installation? We’ve got you covered! Learn how to seamlessly install WordPress on various popular hosting platforms. It’s simpler than you think. Let’s get started!
These are the steps to install WordPress on Hostinger:
- Access Your Hostinger Account: Start by logging in to your Hostinger web hosting account.
- Navigate to Websites: Once you are logged in, click on “Websites” on the main menu.
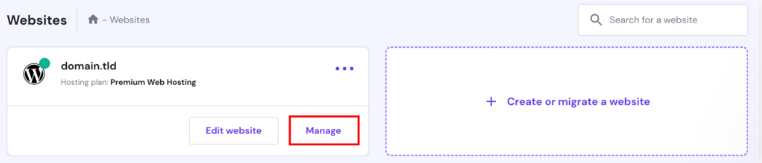
- Select Your Domain: Find the domain name of the website you wish to power with WordPress. Click on the “Manage” button that’s adjacent to your chosen domain name.

- Locate the Auto Installer: On your hPanel Dashboard, you will see a section called “Website.” Under this, you will find the “Auto Installer” button, click on it.
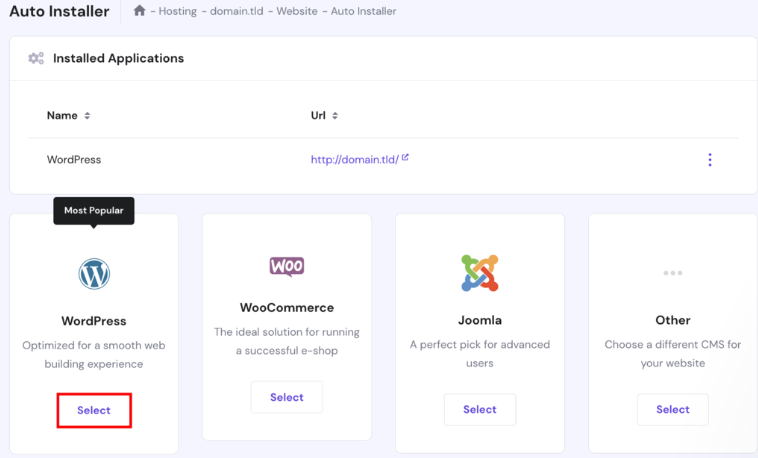
- Choose WordPress: In the Auto Installer section, there should be an option to choose WordPress. After selecting WordPress, click on the “Select” button.
- Install WordPress: Fill out the ‘Install WordPress’ form with the necessary information.
- Website Title: Choose a title for your WordPress website.
- Administrator Username, Password, and Email: These will be used for logging into WordPress. They can be different from your web hosting login details. Make sure to select a strong password to ensure the security of your site.
- Language and Application version: Choose your preferred language and version of the application.
- Automatic Updates: Select the option for “Always update to latest available version” to keep your site updated automatically.
7.Complete the Installation: After all details are filled in, click on the “Install” button.
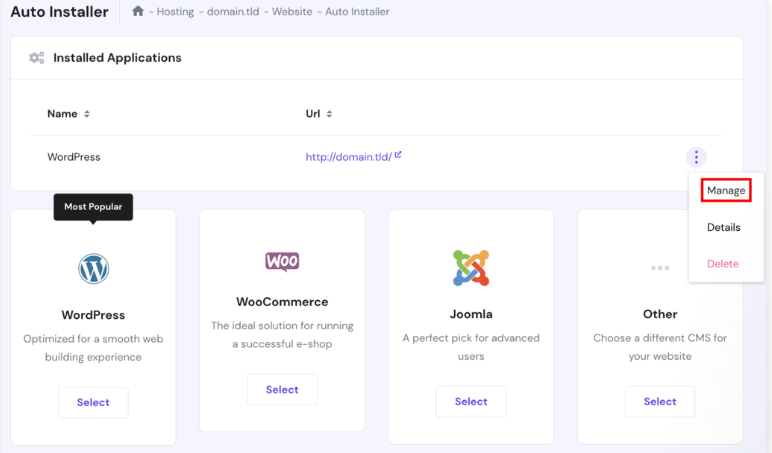
8.Go to WordPress Dashboard: Once installed, Hostinger will display “Installed Applications”. You should see your WordPress URL listed. Click on the three dots next to this URL, then click on “Manage.” This will bring you to “My WordPress Dashboard.”
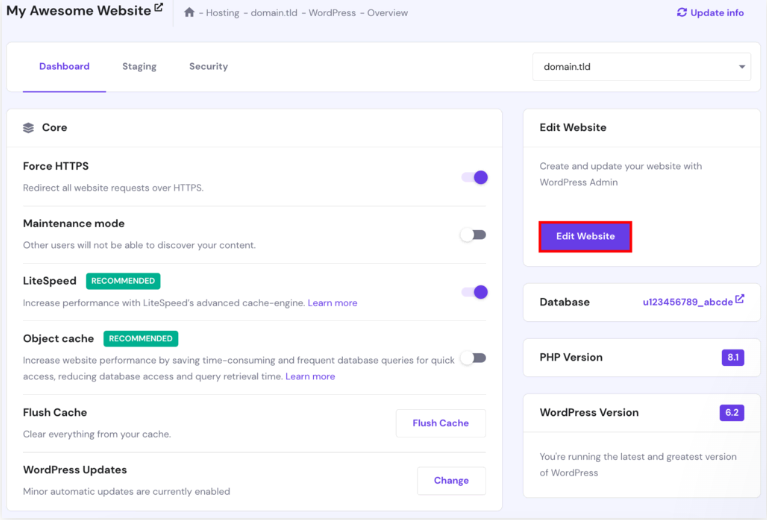
9.Edit Website: To start editing your website, click on the “Edit Website” button on the WordPress Dashboard. This will take you to the WordPress Administration Dashboard, where you can start building your website.
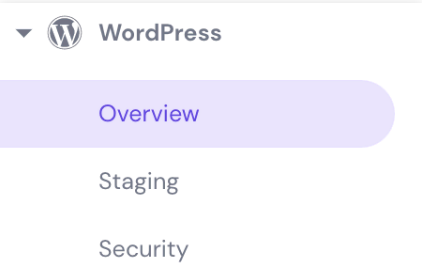
10. Alternate Access: There’s an alternate way to access the WordPress Admin Dashboard. You can simply click on the “Overview” button located near WordPress on the hPanel.
Following these steps will allow you to successfully install WordPress on Hostinger. If you need further clarification on any of the steps, feel free to ask!
Launching Your Blog: A Comprehensive Guide To Getting Started
After installing WordPress, now we must move on to blogging. Blogging isn’t just about penning down thoughts; it’s about creating an identity, building a community, and yes, perhaps even inspiring change. With every word, every click, you’re carving out your digital space, and that’s pretty exciting!
Now we’ll walk you through setting up your first blog step by step – right from creating your WordPress account to writing that exciting first post, all the way to gaining your first followers. Plus, we’ll throw in some bonus tips that’ll make your blog shine even brighter!
So, buckle up, aspiring blogger. You’re about to embark on a journey where your words become your world. Ready? Let’s start creating your blog.
Step 1: Create Your Account
The first exciting step to bring your blog to life is creating your account on WordPress.org. Here’s how you do it:
- Visit WordPress.org: Go to the WordPress.org website.
- Go to Register: On the top right of the page, click on the “Log In” button. It will redirect you to the login page where you will find a “Register” option. Click on it.
- Fill in Details: Fill out the registration form with the required information. This includes a username and an email address. Make sure to select a strong password to ensure your account’s security.
- Accept Terms: Make sure to read the Privacy Policy and Terms of Service, then check the box that says you agree to them.
- Complete Registration: After filling in all the information, click on the “Register” button at the bottom of the form.
- Verify Email Address: WordPress.org will send you an email to verify your email address. Open the email and click on the verification link.
- Log In: Once your email address has been verified, you can log in to your WordPress.org account using the username and password you selected during registration.
Step 2: Write Your First Post
Now that you’ve set up your account and decided on your blog’s identity, it’s time to introduce yourself to the world through your first post. This is where you get to flex your writing muscles and start your journey as a blogger.
Here’s how you can write your first blog post:
- From your WordPress dashboard, navigate to the “Posts” section. You will see an option that says “Add New Post”. Click on this to start drafting your first blog post.
- The content of your first blog post is crucial. This is where you introduce yourself to your readers and give them a glimpse of what they can expect from your blog in the future. Make it engaging and compelling so that they’ll want to join you on your blogging journey.
Some things you might want to consider including in your first post:
- Introduce yourself: Share a little about who you are. You could talk about your background, your interests, and why you’ve decided to start a blog.
- Describe your blog: Tell your readers what your blog is about. Is it a travel blog? A food blog? A tech blog? Make sure to clearly communicate the type of content they can expect to see.
- Invite them to join you: End your post by encouraging readers to follow your blog or to join you on this new journey. You could ask them to subscribe to your blog, leave a comment, or share your post on social media.
Remember, authenticity resonates with readers, so don’t hesitate to share your unique perspective, excitement, and the real person behind the blog.
Congratulations on drafting your first blog post! You are now officially a blogger.
Step 3: Display Your Posts
Once you’ve penned down and published your first blog post, it’s crucial to think about how you present your content to the readers. The way you display your posts can greatly influence your blog’s look and feel and impact the reader’s experience.
This is where the Blog Posts block comes in handy on WordPress. It’s a tool that helps you organize and display your posts on different pages of your site in an appealing and readable manner.
Here’s how you can use it:
- Homepage Display: Your homepage is often the first page your visitors see, so you’ll want to make a good impression. One way to do this is by displaying all of your posts in a grid format using the Blog Posts block. This provides a quick overview of your content and allows visitors to easily select the posts they want to read.
- Category Pages: Another way to use the Blog Posts block is by creating specific pages for different categories of posts. For instance, if you’re running a food blog, you could have separate pages for ‘Desserts’, ‘Appetizers’, ‘Main Courses’, etc. Each of these pages would only show posts that you’ve categorized accordingly, making it easier for readers to find the content they’re interested in.
In addition to the Blog Posts block, WordPress offers other tools for displaying posts, such as the Latest Posts block or the Related Posts feature. These allow you to further customize how your posts are presented to readers, offering them more ways to discover your content.
Remember, a well-organized blog not only looks professional but also enhances the user experience by making it easy for visitors to navigate your content. So, take some time to think about how you want to display your posts and create an arrangement that best suits your blog’s style and content.
Step 4: Create a Navigation Menu
A navigation menu is an integral part of your blog. It serves as a roadmap for your website, allowing readers to quickly and easily find their way around your site and explore your content.
Creating a navigation menu in WordPress involves a few straightforward steps:
- Prepare Your Content: Before creating a menu, you’ll need to have some content ready. This could include pages like Home, About, Contact, and Blog. You might also have different categories of blog posts that you want to include in your menu.
- Start Creating Your Menu: To create a menu, go to your dashboard and navigate to “Appearance,” then click on “Editor”. Here, you’ll find the Navigation block. This is where you can create and customize your navigation menu.
- Add Links to Your Menu: Now you’re ready to add links to your menu. These could be pages, categories, specific posts, and even links to other websites. The most common pages to include are Home, About, and Contact. If your blog has different categories, you can include these as separate items in your menu, making it easy for readers to find related posts.
Remember, the purpose of the navigation menu is to make your website user-friendly. Keep your menu organized and straightforward, and make sure all the links work correctly. A well-structured navigation menu can greatly enhance the user experience, keep readers engaged, and encourage them to explore more of your content.
Step 5: Get Your First Followers
Now that your blog is live and has some great content, it’s time to start building your readership. This step is all about attracting and engaging your first followers.
Here’s how you can get started:
- Add a Subscription Form: The first thing you’ll want to do is add a Subscription Form to your site. This is a tool that allows visitors to enter their email address to receive updates when you publish new posts. Consider placing this form in prominent places such as the sidebar, footer, or within your blog posts. WordPress makes it easy to add this with the Subscription Form block.
- Invite Friends and Family: One of the easiest ways to get your first followers is by inviting your friends and family to visit your blog and click the follow button. They can help provide the initial engagement and feedback that can be invaluable for a new blog.
- Connect with Social Networks: In addition to the above, you can broaden your reach by connecting your blog to your social media networks. This means that every time you publish a new post, it will automatically be shared on platforms like Facebook, Twitter, and more. This not only saves you time but also helps to get your content in front of a wider audience.
Remember, growing a blog takes time and persistence. Be patient and consistent with your efforts. Engage with your followers, respond to comments, and always be on the lookout for ways to grow your audience.
Now, celebrate your accomplishment! Your blog is set up, looking great, and ready to attract and engage readers. Welcome to the blogging community!
Bonus Tips
If you’ve followed through the first five steps, congratulations! You now have a solid foundation for your blog. But why stop there? Here are some additional tips that can help you elevate your blogging game:
- Review Your Discussion Settings: Under ‘Settings’ then ‘Discussion,’ you can manage how your visitors interact with your posts. For example, you can decide if you want to approve comments before they appear on your blog or if you want to allow comments at all. A vibrant comments section can encourage engagement and create a sense of community among your readers, but it’s important to manage it effectively to avoid spam or inappropriate content.
- Explore Different Themes: WordPress offers a plethora of themes at ‘Appearance’ then ‘Themes.’ Themes change the look and feel of your blog without altering the content. Experimenting with different themes can help you find the perfect look that aligns with your blog’s identity and your personal taste.
- Start a Mailing List: An email list is a powerful tool for building a dedicated audience. It allows you to communicate directly with your readers and keep them updated about new posts or any exciting news. The Mailchimp block in WordPress can help you set up a mailing list with ease.
These bonus steps, while optional, can enhance your blog’s appeal, user experience, and reach. Implementing them shows your commitment to providing the best content and experience for your readers.
Designing And Customizing Your Blog
After completing the above process, now we can delve deeper into designing and customizing our website. From choosing the perfect WordPress theme, making critical customizations, optimizing for those all-important search engines, to the magic of XML sitemaps and permalinks, we’re going to cover it all.
So, get ready, because you’re about to embark on a thrilling ride to creating a blog that will not only look great but perform even better. Let’s dive in!
Choosing a WordPress Theme
A WordPress theme is essentially a pre-built website design template, providing you with a head start in the design process. It defines your site’s appearance, layout, and some features.
Upon creating your blog, WordPress provides a simple, default theme. But you’ll likely want to choose a theme that aligns with your blog’s name, brand, and the user experience you aim to offer.
With thousands of themes available, the choice can feel overwhelming, but it’s crucial not to get lost in endless options. Remember, your theme can be changed at any time, so start with something suitable, not perfect. Over time, as your brand develops and you learn more about what works best for your audience, your theme choice can evolve too.
Here’s a simple step-by-step guide to help you choose a WordPress theme:
- Access Your WordPress Admin: Log into your WordPress dashboard by visiting [yourdomain].com/wp-admin and enter your credentials.
- Navigate to Themes: Hover over the “Appearance” menu in the sidebar and click “Themes.”
- Add New Theme: Click on the “Add New” button to access a multitude of WordPress themes.
- Use Feature Filter: To streamline your search, use the “Feature Filter” which allows you to categorize themes by “layout,” “features,” and “subject.” This filter helps you find a theme that closely matches your blog’s intended style and needs.
- Preview and Install: Once you’ve found a theme that tickles your fancy, click on the theme’s thumbnail for a preview. If it suits your style and the blog’s topic, click the “Install” button.
- Activate Your Theme: Once installation is complete, click the “Activate” button. Voila, your theme is now ready!
Remember, if you can’t find a theme that you love, there are premium themes that you can purchase from sites like Themeforest, Elegant Themes, StudioPress, and Thrive Themes. These premium options often provide additional features and a more unique design.
Customizing Your WordPress Blog
Once you’ve chosen and activated your theme, the next step is to customize your blog to make it unique and functional. The level of customization available to you largely depends on the theme you’ve chosen, but there are some universal features you can adjust.
- Customize Theme Settings:
On your active theme, click on the “Customize” button. This will take you to a screen with a variety of settings that you can tweak, including colors, fonts, and layouts. The options available will vary depending on the theme you’ve chosen.
One of the first and most critical sections to edit is the “Site Identity.” Here, you can add your blog’s name and a tagline if you want. Click “Save and Publish” when you’re done to keep your changes.
- Set Up Plugins:
Plugins extend the functionality of your WordPress blog, offering tools and features like contact forms, SEO analysis, e-commerce functionality, and improved site security. You can download these plugins directly through WordPress.
Page builders like Elementor and Divi are powerful WordPress plugins that allow users to create and customize websites without needing to know how to code. They provide a flexible and intuitive interface that revolutionizes the process of website creation, making it accessible to a broader range of people.
Instead of being confined to the limits of traditional website templates, page builders offer complete creative control with drag-and-drop functionality. You can create your pages by simply moving design elements—such as text boxes, images, buttons, and other widgets—around the page to the desired location. This interactive approach is ideal for beginners as well as for professionals looking to streamline their workflow.
Elementor and Divi also provide a library of pre-designed blocks and full-page templates, further simplifying the design process. These can be used as they are, or modified according to the unique requirements of your website. The availability of such resources can save considerable time, particularly if you’re not a design expert.
One of the biggest advantages of these tools is their real-time, front-end editing capabilities. Traditional WordPress editor operates on the backend, meaning you make changes and then preview them. With page builders, you see changes as you make them, giving you a precise vision of the final result.
Beyond mere aesthetics, page builders also facilitate more complex functions like responsive design adjustments for different device sizes, custom CSS, and integration with third-party plugins for things like SEO, e-commerce, and social media. This results in a comprehensive, feature-rich web design solution.
While page builders have democratized website design, it’s important to consider the potential trade-offs. These can include slower website load times due to additional scripts and stylesheets, and potential difficulties if you ever decide to switch themes or page builders.
- SEO Optimization:
Optimizing your blog for search engines is key to driving traffic to your site. A popular tool for this is the Yoast SEO plugin. This tool helps you optimize the technical aspects of your blog, provides keyword optimization suggestions for your posts, and helps you set up metadata, among other things.
- Set Up Permalinks:
Permalinks are the permanent URLs to your individual blog posts, as well as your pages and other content. WordPress provides a few options for permalink structures. The “Post name” option is generally a good one to choose, as it uses keywords from your title to create a unique permalink.
- Set Up XML Sitemaps:
XML sitemaps help search engines more intelligently crawl your site, allowing you to be discovered more easily. You can enable this feature with the Yoast SEO plugin.
Remember, customization is a process of evolution. As you understand more about your audience’s behavior and preferences, you can make changes to better suit their needs and enhance the overall user experience.
Optimizing Your Blog for Search Engine Traffic
Search Engine Optimization (SEO) is a crucial aspect of running a successful blog. It involves optimizing your website to make it more visible to people who are searching for topics related to your content on search engines like Google. SEO entails several steps and procedures.
Install an SEO Plugin:
One of the simplest ways to optimize your WordPress blog for search engines is by installing an SEO plugin like Yoast SEO and Rankmath. These plugins helps you optimize your blog posts for keywords, create meta descriptions, and implement other SEO best practices.
Use Google Site Kit
Site Kit is Google’s official WordPress plugin that provides a comprehensive suite of tools to help website owners, developers, and agencies understand, manage, and optimize their sites. It aims to make data-driven decision-making more accessible by offering valuable insights from multiple Google products in a single, easy-to-use dashboard.
Here are some of the main functions of Site Kit:
- Easy Site Verification: Site Kit simplifies the process of verifying site ownership on Google Search Console. This eliminates the need to manually insert a code snippet into your site’s source code, saving you time and effort.
- Dashboard Insights: Site Kit provides a streamlined dashboard that integrates data from Google Search Console, Google Analytics, PageSpeed Insights, and AdSense. This gives you a detailed understanding of your site’s performance, including traffic sources, popular pages, and how people find your site, all in one place.
- No Source Code Editing: Site Kit allows users to install and manage Google tools without any source code editing, making it a more convenient option, especially for those with little to no coding experience.
- Cross-Product Insights: The tool offers insights from various Google services, providing a comprehensive understanding of your website’s performance. This helps you make informed decisions to improve and monetize your content.
- Role Management: Site Kit supports different roles and permissions, making it possible to manage who has access to the site’s data. This is particularly useful for developers and agencies working on client sites.
- Easy Integration for Developers and Hosting Providers: If you’re a developer or hosting provider, Site Kit allows for easy provisioning of key Google tools and metrics to users, adding value to your service offerings. You can also integrate Site Kit’s stats natively into your platform’s UI.
To start using Site Kit, you need to install the plugin from the WordPress plugin directory. Once installed, you can use its features to monitor key metrics, track how your posts are performing, and identify potential areas of improvement for your site.
Set Up Your Website Information:
Within the Yoast SEO settings, you’ll find a section titled “Your Info.” Here, ensure your website’s name and tagline are correct. Then, identify yourself as a company or a person.
Google Search Console:
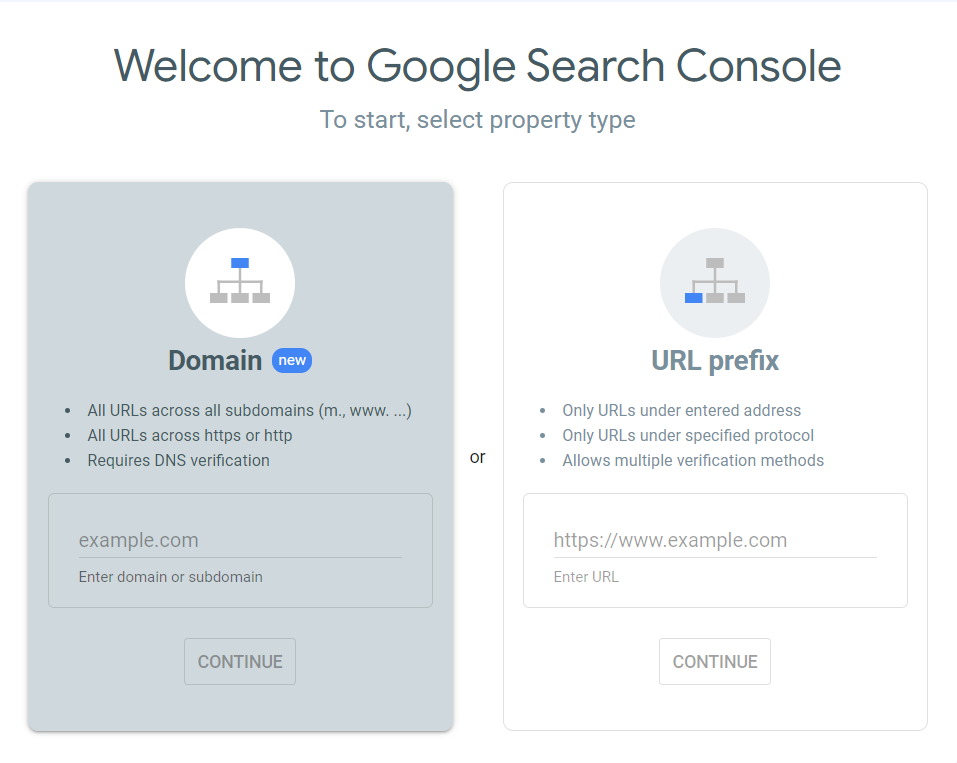
Google Search Console is an essential tool for any website owner. It provides insights into how Google views your website and helps you optimize your visibility in search results. In the Yoast SEO plugin, there is a section dedicated to Google Search Console. You can get your Google Authorization Code and allow Yoast SEO to pull in data from your Google Search Console.
Configure Yoast SEO:
Yoast provides a simple installation wizard that guides you through a series of steps to optimize your WordPress blog. This process involves setting up your website type, social profiles, visibility settings, and more.
XML Sitemaps:
XML sitemaps make it easier for search engines to crawl your website, which improves your visibility in search results. You can enable this feature in Yoast SEO’s “Features” tab. Once enabled, it automatically updates your sitemap, so you don’t have to worry about it.
Permalinks:
Permalinks are the permanent URLs for your blog posts and pages. They should be SEO-friendly and descriptive. In WordPress, you can choose the “Post name” permalink structure, which uses keywords from your post titles to create unique permalinks.
Remember, optimizing your blog for search engines is a continuous process that involves regular adjustments and updates as SEO trends change. However, with the right tools and approach, you can significantly improve your blog’s visibility and traffic.
XML Sitemaps and Why They’re Important
An XML sitemap is essentially a blueprint or roadmap of your website that aids search engines like Google in understanding the structure of your site while they are crawling it. It lists all of the URLs (pages, posts, images, etc.) for your site, allowing search engines to see the complete structure of your site and retrieve it more efficiently.
Here’s why XML sitemaps are important:
- Improved Visibility and Indexing: An XML sitemap makes it easier for search engines to discover and index your website’s pages. This is especially beneficial for new websites, large websites with lots of content, or websites with a complex structure.
- Prioritizing Important Content: Sitemaps allow you to assign priority values to your pages, indicating to search engines which pages you deem most important. This could be useful when you want certain pages on your website to be crawled more frequently.
- Updated Content Gets Indexed Faster: Whenever you update a blog post or add new content, your sitemap gets updated, letting search engines know about the fresh content, leading to quicker indexing.
- Better SEO: Since a sitemap helps search engines crawl and index your website more effectively, it indirectly improves your search rankings.
In the context of a WordPress blog, if you’re using an SEO plugin like Yoast SEO, it has a built-in feature that automatically creates and updates your XML sitemap. You simply need to enable this feature, and your sitemap is taken care of, keeping search engines updated about your blog content.
Setting Up Permalinks
Permalinks, or permanent links, are the full URLs to individual pages or posts on your website. They’re called ‘permanent’ because, ideally, they remain unchanged for the lifetime of your webpage.
Permalinks are crucial not only for your users but also for search engines, as they provide important information about the content of your page just by looking at the URL. They are a significant part of your site’s SEO and user experience.
By default, WordPress uses URLs that have day and name in them, or plain numeric IDs, neither of which are very informative or friendly for users or search engines.
For example, a default permalink might look like this: www.yourwebsite.com/?p=123. As you can see, this tells you nothing about the content of the page.
The good news is that WordPress allows you to customize your URL structure for your permalinks. Here’s how you do it:
- Go to your WordPress dashboard.
- Navigate to “Settings” in the sidebar and click on “Permalinks.”
- Here, you’ll see several options: “Plain,” “Day and name,” “Month and name,” “Numeric,” “Post name,” and “Custom Structure.”
For the best results in SEO and usability, most websites use the “Post name” option, which means the post title appears in the URL, making it readable to humans and search engines alike. For example: www.yourwebsite.com/post-name.
After selecting your desired structure, make sure to save your changes.
Remember, if you’re changing the permalink structure on an existing website, ensure you set up the proper 301 redirects so any old URLs redirect to the new ones, ensuring you don’t lose any search engine rankings or lead to broken links.
Ways To Make Your Blog Posts More Compelling
After customising and designing your blog, you need to stand out from the crowd, it isn’t just a nice idea—it’s a necessity. A compelling blog is a powerhouse tool that captivates your audience, engaging them from the first word to the last.
But how do you create such captivating content?
It’s not as elusive as it might seem. These 11 tried-and-true strategies can transform your blog posts from being just ‘another read’ to ‘must-read’ material.
Whether you’re new to blogging or a seasoned scribe, buckle up as we delve into crafting compelling content that has your readers coming back for more.
Be Useful
At the core of every compelling blog post is usefulness. This principle ties back to the fundamental reason why blogs exist in the first place: to add value to the reader’s life. Whether you’re aiming to inform, inspire, educate, entertain, or solve a problem for your audience, the ultimate goal is to offer something of value that enhances their knowledge, changes their perspective, or helps them in their daily life.
A useful blog post goes beyond merely rehashing existing information—it provides a fresh take, offers actionable insights, or shares novel data that the reader can apply immediately. As you draft your posts, it’s crucial to continually ask yourself, “How does this help my reader? What are they gaining from this?”
Usefulness could come in various forms, like a comprehensive guide on a complex topic, a review that helps in making a purchasing decision, a personal anecdote that provides encouragement, or a list of tips that simplify a difficult task.
The key is to make sure each post you publish serves a specific purpose. If it isn’t informative, inspiring, educational, entertaining, or problem-solving, it might be worth rethinking your content. The more useful your content is, the more compelling your blog becomes, increasing the chances that readers will return for future posts.

Share Your Opinion
In an age where countless blogs cover similar topics, what makes yours unique? One critical factor is your personal opinion. Readers are not only looking for facts and information, but they’re also seeking your unique perspective and insights on the topic at hand.
When you share your opinion, you give your blog post a human touch, setting it apart from generic information out there. Your viewpoint can stimulate thought, foster conversations, and build a stronger connection with your audience. Readers appreciate a distinct voice and viewpoint, and they will come back to your blog for that authentic perspective.
But remember, your opinions should always be grounded in facts and logic. It’s important to express your point of view responsibly and respectfully, being open to differing viewpoints, and facilitating a healthy discussion.
Don’t be afraid to challenge the status quo or go against popular opinion if you genuinely believe in your viewpoint and can back it up with logical reasoning. Remember, it’s your blog, and your unique voice and perspective are what will keep your readers coming back.
Cut Out The Fluff
In the realm of blogging, less can often be more. “Cutting out the fluff” means eliminating unnecessary or redundant content from your blog post, focusing only on what adds value to your reader’s experience. Fluff could be repetitive information, overly complex jargon, unnecessary details, or tangential ideas that do not contribute to your central point.
Why is it important to remove the fluff? Because in today’s fast-paced digital world, readers value concise and straightforward content. A post that is full of unnecessary details or lengthy explanations can lose the reader’s interest, dilute your main message, and come across as unprofessional.
Before hitting publish, review your post with a critical eye. Ask yourself, “Does this sentence/paragraph add value? Does it support or enhance my main points?” If the answer is no, it’s likely fluff and should be removed or revised.
Remember Antoine de Saint-Exupery’s wise words: “Perfection is achieved, not when there is nothing more to add, but when there is nothing left to take away.” Strive for this form of perfection in your blog posts by crafting content that is as long as necessary, but as short as possible. Each word should earn its place, contributing meaningfully to your post. This ensures your message is clear, impactful, and respects your reader’s time.
Visualize Your Reader
Visualizing your reader is a powerful writing technique that can significantly improve the resonance and impact of your blog posts. It means keeping a clear image of your typical reader in mind as you write. Imagine you’re writing a letter to this person, and you’re explaining the topic directly to them.
This practice can make your content more personalized and relatable, helping to foster a deeper connection with your audience. Instead of writing for the anonymous masses, you’re writing for one specific person, making your content more direct, engaging, and conversational.
As you sit down to write, think about the person who would find your blog post useful. Consider their interests, their background knowledge, their problems and aspirations. Try to anticipate their questions and address them in your content. Use a tone and language that matches their understanding and preferences. You could even give this imagined reader a name, a job, and a backstory to make them more tangible.
Writing with a specific reader in mind often leads to content that resonates more with your audience. It feels like you’re speaking directly to them, addressing their unique needs and interests. As a result, readers are more likely to think, “Wow. It’s as if they wrote that especially for me,” creating a deeper connection and compelling them to come back for more.
Make Your Posts Scannable
Today’s online readers are often in a hurry, and they typically scan content rather than read every word. They quickly look over the text, stop at bits that catch their interest, and then move on. To cater to this reading style, it’s essential to make your blog posts easily scannable.
Scannable content is structured in a way that allows readers to quickly identify the key points or sections that are of interest to them. Here are a few strategies to make your posts scannable:
- Use subheadings: Subheadings break up your content into smaller, manageable sections and give the reader a sneak peek into what each section is about.
- Use bullet points or numbered lists: Lists are easy to skim and help to clearly outline steps, tips, or points.
- Bold or italicize key points: Highlighting important points can draw the reader’s attention to them amidst the other content.
- Keep paragraphs short: Long paragraphs can appear daunting. Keeping paragraphs to a few sentences each can make your post more readable.
- Use white space: Don’t be afraid to leave some space on the page. White space can provide visual relief and make your content less overwhelming.
Making your blog posts scannable doesn’t mean your readers won’t consume your content fully. Instead, it allows them to initially scan through and then delve deeper into the parts that are most relevant or interesting to them. By providing a better user experience, you increase the chances of readers sticking around, consuming more content, and returning for future posts.
Work and Rework Your Headlines
A blog post’s headline is arguably one of its most critical components. It’s the first thing readers see and can often determine whether they decide to read the post or scroll past it. A compelling headline can make your post stand out amidst the sea of online content, drawing readers in and enticing them to learn more.
Creating a powerful headline isn’t a one-and-done process. It involves drafting several versions, evaluating them, and tweaking until you find the one that best captures the essence of your post and appeals to your target audience. Here are a few tips to guide the process:
- Make it informative: A good headline gives a clear idea of what the post is about. Readers should know what to expect from your post just by reading the headline.
- Keep it concise: Shorter headlines are generally more impactful and easier to digest. Try to convey your message in a succinct yet enticing way.
- Use powerful words: Words that evoke emotion or a sense of urgency can make your headline more enticing. But ensure they truly represent the content of your post.
- Use numbers: Headlines with numbers, like “5 Ways to Improve Your Writing Skills”, often attract attention as they promise a concise, easy-to-follow structure.
- Promise a benefit: If your post solves a problem, makes life easier, or offers valuable information, reflect this in your headline.

However, while crafting catchy headlines is important, avoid falling into the trap of clickbait—misleading headlines designed solely to attract clicks. This may drive initial traffic but can harm your credibility and reader trust.
Always ensure your headline is an accurate reflection of your post’s content. By consistently delivering on what your headlines promise, you build a reputation for quality and reliability, making your blog more compelling to readers in the long run.
Write with Passion
Writing with passion is all about letting your genuine interest and enthusiasm for your topic shine through in your blog posts. When you care deeply about what you’re writing, it’s reflected in your words and your readers can feel it. Passionate writing tends to be more engaging, relatable, and impactful, thereby drawing readers in and making them care about the topic too.
So, how can you infuse your writing with passion?
- Choose topics you love: If you’re genuinely interested in what you’re writing about, it becomes much easier to write passionately about it.
- Show your excitement: Don’t shy away from letting your excitement show in your writing. Use expressive language, share personal anecdotes, and convey your enthusiasm directly.
- Express your unique perspective: Your personal take, based on your experiences and insights, can add depth and authenticity to your writing.
- Be genuine: Authenticity is key to passionate writing. Being true to your feelings and beliefs can create a powerful connection with your readers.
But remember, passion doesn’t mean you lose objectivity or balance in your writing. It’s important to maintain a level of professionalism and ensure your information is accurate and well-researched.
Moreover, there might be times when you need to write about topics that you’re not particularly passionate about. In such cases, try to find an angle that you find interesting or connect it to a broader theme that you care about. The bottom line is, if you care about what you’re writing, your readers are more likely to care about it too. And that’s what makes a blog post truly compelling.
Give Your Readers Something to Do Next
One of the key characteristics of a compelling blog post is that it doesn’t just end when the post ends; it motivates readers to take some action. This not only gives readers a practical way to engage with your content but also deepens their relationship with your blog, encourages further exploration, and increases the likelihood that they’ll return.
What exactly should this action be? It depends on the purpose of your post and your broader blogging goals. Here are a few common “next steps” you might encourage readers to take:
- Comment: Invite your readers to share their thoughts, experiences, or questions in the comments section. This can foster a sense of community, generate further discussion, and provide you with valuable feedback.
- Read related posts: If you have other posts that expand on the topic at hand, link to them. This can provide additional value to the reader and keep them on your blog longer.
- Share: Encourage readers to share your post on social media, email, or elsewhere. This can help spread your content to a wider audience.
- Subscribe: If you have an email list or newsletter, invite your readers to subscribe for updates. This can help build a long-term relationship with them.
- Buy, donate, or take other direct action: If your blog post is tied to a product, service, cause, or event, you might encourage readers to take direct action related to it. Just make sure any promotional content is balanced and doesn’t overshadow the value you’re providing in your post.
Tell Stories
Storytelling is a powerful tool in the realm of blogging. Humans are naturally drawn to stories because they help us understand and make sense of the world around us. Stories can spark our emotions, captivate our attention, and make complex or abstract concepts more relatable and memorable.
Incorporating stories into your blog posts can bring your content to life in a unique way. Here’s how:
- Personal anecdotes: Sharing personal experiences can make you more relatable to your readers. It shows them you’re not just a faceless author, but a real person with real experiences. Plus, personal stories can often serve as effective illustrations of the points you’re trying to make.
- Case studies or examples: Telling the story of how a particular individual or company tackled a problem or achieved a goal can provide concrete, real-world evidence to support your points. These types of stories can also be inspiring or instructive for your readers.
- Hypothetical scenarios: Imaginary stories can also be effective, especially when you’re trying to help readers visualize a concept or understand the implications of a particular course of action.
When telling stories, it’s important to keep your audience in mind. Make sure your stories are relevant to your readers and align with the overall message of your post. Also, while stories can make your content more engaging, they should not overshadow the main point of your post or make your content difficult to follow.
Give Your Posts Some Visual Appeal
Visual appeal plays a crucial role in making your blog posts more compelling. Adding relevant, high-quality images, videos, infographics, or other visual elements can break up large blocks of text, making your posts more digestible and engaging. Visual content can also help convey your message more effectively and make your content more memorable.
Here’s how to incorporate visual elements in your blog posts:
- Use relevant images: Images can capture readers’ attention, add interest to your post, and help illustrate your points. Make sure any images you use are relevant to your content and of high quality.
- Include infographics: Infographics can be a powerful way to convey complex information in a visually appealing, easy-to-understand format. They’re particularly useful for presenting data, comparisons, or process steps.
- Embed videos: If a picture is worth a thousand words, a video could be worth even more. Videos can add a dynamic element to your blog post, making it more engaging and interactive.
- Use screenshots or diagrams: If you’re explaining a process, especially a technical one, screenshots or diagrams can be invaluable in helping readers understand.
- Leverage white space: Visual appeal isn’t just about adding images or other visual elements. It’s also about using white space effectively to break up your content and make it easy on the eyes.
While visuals can enhance your blog posts, they should not distract from your content. Make sure they complement your text and contribute to the overall narrative. Also, always respect copyright laws and either use your own images, purchase stock images, or use images from sources that grant the necessary permissions.
Incorporating visual appeal into your blog posts can make them more engaging and compelling, thereby increasing the chances that readers will stay, read, and return for more.
What to Write About
Determining what to write about on your blog can be one of the most exciting yet challenging aspects of blogging. Ultimately, your blog content should be a mix of what you are passionate about and what your audience is interested in reading. Here are a few tips to guide you in deciding what to write about:
- Know your audience: The first step in determining what to write about is understanding who your audience is. What are their interests? What problems do they have that you can solve? This can be achieved through market research, surveys, or by looking at popular posts in similar niches.
- Share your expertise: Write about what you know. Leverage your expertise, experience, or personal journey. Readers appreciate blogs that offer genuine insights and unique perspectives.
- Find your niche: Having a specific focus or niche for your blog can help you build a dedicated audience. For instance, instead of writing about “health and wellness” in general, you could focus on “yoga for busy professionals.”
- Keep up with industry trends: If you’re blogging within a specific industry or niche, stay current with the latest trends, news, and discussions. This ensures your content is relevant and timely, which can help attract readers.
- Listen to your audience: Pay attention to your readers’ feedback. What posts do they engage with the most? What questions are they asking in the comments? This can give you clues about other topics they’re interested in.
- Solve a problem: Some of the most successful blog posts are those that solve a problem for the reader. These can be “how-to” guides, tutorials, or informational posts that answer common questions in your niche.
- Be consistent: Once you’ve chosen what to write about, be consistent in delivering content around that theme. This helps build your authority in the area and keeps your readers coming back for more.

The goal is to provide value to your audience, whether that’s through educating, entertaining, or inspiring them. If you can do that consistently, you’ll have no problem finding things to write about on your blog.
Different Types Of blogs
Different types of blog posts serve unique purposes, catering to various reader needs and interests. Here are some common blog post formats and their main functions:
- How-To Guides or Tutorials
These posts provide step-by-step instructions to help readers accomplish a specific task or learn a new skill. They’re great for teaching your audience something new, solving a problem, or providing a practical resource. Examples could include “How to Fix a Leaky Faucet” or “A Beginner’s Guide to Using Photoshop.”
- Listicles
A listicle is a blog post presented in the form of a list. They’re reader-friendly, scannable, and can range from entertaining to informative. Titles often contain numbers, like “10 Ways to Improve Your SEO” or “5 Delicious Vegan Dinner Recipes.”
- Reviews or Product Comparisons
These types of posts can provide valuable insights for readers considering a purchase or looking for detailed product information. They typically involve an assessment of products or services based on personal experience or thorough research, e.g., “Samsung Galaxy S23 vs. iPhone 14: Which is Better?”
- Thought Leadership or Opinion Pieces
Thought leadership posts showcase your expertise on a topic and often involve sharing unique insights, opinions, or predictions. They’re great for building credibility and sparking discussion. An example might be “The Future of AI in Healthcare.”
- Case Studies
Case studies are in-depth analyses of specific instances, events, or examples that illustrate a broader point or principle. They are usually evidence-based and serve to demonstrate how a theory or concept works in a real-world scenario, for instance, “How Company X Increased Their Sales by 50% Using Social Media Marketing.”
- Interviews
Interview posts feature conversations with industry experts, thought leaders, or influential individuals. They can provide unique insights and add a fresh perspective to your blog. An example could be “An Interview with Elon Musk on the Future of Space Travel.”
- Personal Stories or Anecdotes
These posts offer a more personal, intimate perspective. They can help create a connection with your audience and make your blog feel more authentic. These could include stories about your own experiences, lessons learned, or personal journeys.
- News or Trend Analysis
These types of posts keep readers informed about the latest developments in your field or analyze current trends. They help position your blog as a timely and relevant source of information.
- Guest Posts
Guest posts are written by individuals other than the usual blog author(s). They can provide fresh content, different perspectives, and increase your blog’s reach if the guest author shares the post with their network.
The type of blog post you choose to write depends on your audience, your goals, and the topic at hand. It’s a good idea to mix up different formats to keep your content diverse and engaging.
Implementing SEO Strategies
When you think about SEO, it’s easy to get overwhelmed with terms like “SERPs”, “Ranking factors”, or “Backlinks”. But strip away the jargon, and SEO is simply about making your website more visible, compelling, and user-friendly.
It’s the secret sauce that puts your content at the top of the Google pile, and it’s absolutely essential for anyone wanting to drive traffic and growth. So, whether you’re a seasoned marketer, a budding entrepreneur, or just curious about SEO, I’ll break it down for you. Let’s explore the magic behind On-Page and Off-Page SEO and why they matter more than ever today.
Understanding On-Page SEO
Search Engine Optimization, better known as SEO, is a fundamental part of digital marketing. It involves several strategies designed to enhance your website’s visibility and ranking on search engine results pages (SERPs). SEO can be divided into two main categories: on-page SEO and off-page SEO. In this article, we will dive deep into the realm of on-page SEO, what it involves, and how you can leverage it to improve your website’s performance.
What is On-Page SEO?
On-page SEO, also known as on-site SEO, refers to the practice of optimizing elements on a website (as opposed to links elsewhere on the Internet and other external signals collectively known as “off-page SEO”) to improve search engine ranking and visibility. This can involve optimizing both the content and source code of a page on your site.
The goal of on-page SEO is to help search engines understand your content and website, ascertain if it is relevant to a searcher’s query, and make your web pages more user-friendly. By focusing on these factors, you can ensure that your content is up-to-date, relevant, and written to address the needs of your audience, giving your website the best chance to rank highly in SERPs.
Key Aspects of On-Page SEO
There are many elements of a webpage that you can optimize for improved search engine performance. Let’s explore some of the crucial aspects:
- Title Tags: Title tags are HTML elements that specify the title of a webpage. They’re the first impression many people have of your page and are displayed on SERPs as the clickable headline for a given result. They are crucial for usability, SEO, and social sharing. The title tag should include your primary keyword and, if possible, should be unique to each page on your site.
- Headings: While the title tag appears in the search results, the heading (usually the H1 tag) appears on the page itself and should be relevant to the page’s content. Having a clear heading structure makes your content more readable and helps search engines understand your content better.
- URL Structure: URLs are one of the first things a search engine will use to determine page rank. Good URLs should be less than 255 characters, including hyphens to separate different parts. Including keywords in your URL can be beneficial, but it isn’t mandatory.
- Alt Text for Images: Image optimization is another important part of on-page SEO. The alt text (or alt tag) is added to an image if the image cannot be displayed, and helps search engines understand what an image is about. It’s essential for those who use screen readers and when the image doesn’t load.
- Page Speed: The speed at which your web pages load is a significant factor in the user experience. If your pages load slowly, you’re likely to lose visitors, and search engines will penalize your pages in the rankings. A few techniques to improve page speed include enabling compression, minifying CSS, HTML, and JavaScript, and optimizing your images.
- Internal Links: When you link your pages together in a way that’s easy to follow, you’re making your website more accessible to both your users and search engines. These links help search engines understand your website structure, and they can give your less popular pages a boost.
- Meta Descriptions: Meta descriptions are HTML attributes that concisely explain the contents of web pages. These are used on search engine result pages to display preview snippets for a given page. They are not a direct ranking factor, but they can influence click-through rates.
- Responsiveness: With more people using mobile devices for browsing than ever before, having a responsive website that can adapt to different screen sizes and devices is a critical aspect of on-page SEO. Mobile-friendliness is a ranking signal, and it improves the user experience, further driving traffic and conversions.
- Keyword Usage: Keywords are fundamental in your SEO strategy. They are the primary method by which search engines understand your website and match your pages to the queries people are searching for. Your keywords should appear in your content, URLs, and meta tags. However, avoid keyword stuffing as it can lead to penalties.
On-Page SEO and Content
While technical aspects are essential, they only make up half of the on-page SEO equation. The other half is content. The phrase “content is king” couldn’t be more accurate when it comes to SEO. Content, whether it’s blog posts, product pages, or an about page, is a major driving factor for on-page SEO.
However, quality is key when it comes to content. Creating high-quality content that offers real value to your readers is crucial. Your content should be well-written, informative, and relevant to your audience. It should also be regularly updated and include various content types such as images, videos, infographics, etc.
For your content to be effective, it should meet the following criteria:
- Original: Unique content that can’t be found elsewhere.
- Relevant: Your subject matter should be related to your business or the interests of your audience.
- Helpful: Your content should provide useful information or solve a problem for your readers.
- Engaging: Your content should encourage readers to engage with your brand, whether it’s leaving comments, sharing your content, or even making a purchase.
Remember, content optimization doesn’t mean just adding keywords. It’s about creating useful, high-quality content that your audience will appreciate, share, and come back to.

On-Page SEO Technical Best Practices
On-page SEO is more than just filling your content with the right keywords. It’s also about the technical side of things. Good technical SEO helps both users and search engines easily find and understand your content. Here are some best practices that should be part of your on-page SEO strategy:
- Use SEO-friendly URLs: Keep your URLs short, relevant, and keyword-rich. They should be easy to read for both people and search engines. Also, use hyphens (-) instead of underscores (_) in your URLs, as hyphens are treated as spaces while underscores are not.
- Optimize Your Title Tags: The title tag is one of the most critical elements of on-page SEO. It’s the first thing users see on search engine results pages (SERPs), and it provides search engines with essential information about your page. Make sure your title tags are unique for each page, include your target keyword, and are under 60 characters so they don’t get cut off in SERPs.
- Use Meta Descriptions: Meta descriptions provide a brief summary of your webpage content. They don’t directly influence rankings, but they do affect click-through rates. Include your primary keyword and make your description compelling to encourage users to click on your result.
- Use Header Tags: Headers help organize your content and make it easier for readers to navigate. H1 tags should be used for the title of your page, while H2, H3, and so on, should be used for subsections. Make sure they are descriptive and include your target keywords where appropriate.
- Keyword Optimization: Make sure to naturally incorporate your primary and secondary keywords in your content, title tags, meta descriptions, and headers. However, avoid keyword stuffing as this can lead to penalties.
- Optimize Your Images: Images can help improve user engagement, but they need to be optimized. Use relevant file names and alt tags to help search engines understand what the image is about. Also, compress your images to improve page load speed.
- Improve Page Load Speed: Page load speed is a ranking factor, and slow-loading pages provide a poor user experience. Optimize your code, compress your images, and leverage browser caching to improve your site’s speed.
- Implement Schema Markup: Schema markup is a type of microdata that helps search engines better understand your content. It can help you stand out in SERPs with rich snippets and improve your click-through rates.
- Use Internal Linking: Internal links help guide users to other relevant content on your site and help search engines understand the structure of your website. Use descriptive anchor text and try to link to your most important pages more often.
- Mobile Responsiveness: Ensure your website is mobile-friendly. Google has a mobile-first indexing approach, which means it primarily uses the mobile version of your content for indexing and ranking.
- Ensure Your Site Is Secure: Google prefers sites that are secured using HTTPS as it protects the integrity and confidentiality of data between a user’s computer and your site.
- Remove Broken Links: Broken links can harm your SEO and provide a poor user experience. Regularly check your website for broken links and fix them or implement redirects.
- Use Canonical Tags: If you have similar content across multiple pages, use canonical tags to tell search engines which version is the ‘original’ or preferred one. This helps prevent duplicate content issues.
- XML Sitemap: An XML sitemap lists all the important pages on your site and helps search engines understand your site structure. Submit your sitemap to Google Search Console and Bing Webmaster Tools.
These best practices will help you create a solid foundation for your on-page SEO strategy. Always remember, the goal of on-page SEO
is not just to rank higher, but to provide a better user experience and deliver relevant, high-quality content to your audience.
On-Page SEO and the Impact of Content
On-page SEO is the process of optimizing individual web pages to earn better rankings and draw more relevant traffic in search engines. It’s an essential aspect of SEO as it directly pertains to the content and structure of your website, things that you can control and manipulate for the best outcomes.
Content lies at the heart of on-page SEO. It is the medium through which you communicate with your audience, provide them with value, and convince search engines of your page’s relevancy and quality. As search engines have become better at interpreting and analyzing content, the role of high-quality content in on-page SEO has become more significant.
- Relevance and Quality of Content: When a user types a query into a search engine, they’re looking for specific information. The more relevant and informative your content is to that query, the more likely the search engine is to rank your page higher. High-quality content that effectively meets the user’s intent tends to rank higher in search engine results.
- Keyword Optimization: Keywords are fundamental to SEO. They signal to search engines what your content is about and help align your webpage with the user’s intent. It’s important to incorporate relevant keywords naturally into your content, title tags, meta descriptions, URLs, and header tags.
- Content Structure and Formatting: The way your content is structured and formatted can significantly impact how well it ranks in search engine results. Use header tags to break up your content into easy-to-digest sections. Lists, bullets, and tables can also help make your content more reader-friendly. This not only benefits the user experience but can also result in featured snippets in search results, which can significantly boost your visibility.
- Use of Visual Content: Including relevant images, infographics, videos, and other visual content can make your content more engaging and informative, which helps improve dwell time (the amount of time a visitor spends on your page). Additionally, search engines can crawl and index the alt text of images, further enhancing your SEO efforts.
- Freshness of Content: Regularly updating your content and adding new, valuable content to your website signals to search engines that your website is current and providing up-to-date information. This can help improve your ranking over time.

- Internal Linking: Within your content, linking to other relevant content on your website can help guide your audience to more information, increase their time on site, and provide additional context to search engines about the content of the linked page.
- Content-Length: While there’s no hard-and-fast rule for the “perfect” length of content, longer, more in-depth content often ranks better in search engines. That being said, the focus should be on providing comprehensive coverage of your topic rather than aiming for a specific word count.
- Unique Content: Duplicating content can lead to SEO issues. It’s crucial that the content you publish is original and offers unique value to your audience.
Off-Page SEO and the Power of Quality Links
Off-Page SEO refers to all the activities you perform outside the boundaries of your website to impact your rankings within search engine results pages (SERPs). It’s a long-term process and involves several techniques like link building, social media marketing, and influencer outreach, but it predominantly relies on the power of quality backlinks.
Backlinks, or inbound links, are hyperlinks that point from one website to another. They’re crucial in SEO because they act like votes of confidence, demonstrating that other sites vouch for your content. However, it’s not merely about the number of backlinks you accumulate; it’s more about the quality of these backlinks.
- Quality Over Quantity: In the world of backlinks, quality trumps quantity. A single backlink from a high-authority, relevant site can have a much greater impact on your rankings than hundreds from low-quality, irrelevant sites. Quality links come from reputable websites that are relevant to your content, have high traffic, and possess a strong domain authority.
- Link Building: This is the process of acquiring new backlinks to your website from external websites. Some common link-building strategies include guest blogging, influencer collaborations, creating high-quality, shareable content, and reaching out to relevant industry leaders or bloggers.
- Anchor Text: The clickable text in a hyperlink is known as anchor text. Using relevant keywords in the anchor text of your backlinks can provide extra SEO value, as it gives additional context to search engines about the linked content.
- Natural Link Profile: Search engines prefer a natural link profile, meaning a mix of both nofollow and dofollow links, a variety of anchor texts, and links from diverse domains. Rapidly accumulating many similar links can be flagged as unnatural and could lead to penalties.
- Local SEO and Directory Listings: Part of off-page SEO includes local SEO efforts, like adding your business to local listings and directories like Google My Business, Yelp, and others. This improves your visibility to local users and helps you earn backlinks from these authoritative sites.
- Brand Mentions: Unlinked mentions of your brand or website also count as a form of off-page SEO. Encouraging positive reviews and comments about your business can lead to increased brand visibility and user trust, indirectly boosting your SEO efforts.
- Social Media Engagement: While not a direct ranking factor, social media engagement can extend the reach of your content and increase the chances of earning quality backlinks.
Off-page SEO, with its focus on backlinks and promotion outside of your website, complements on-page SEO efforts to improve your site’s authority, visibility, and ranking in search results. It’s not just about building links, but about building relationships, reputation, and relevance in your industry. The power of quality links in off-page SEO cannot be underestimated, and earning high-quality backlinks should be a critical component of your SEO strategy.
Other Off-Page SEO Best Practices
While building quality backlinks is a crucial aspect of off-page SEO, there are many other strategies you can utilize to enhance your website’s authority and ranking. These best practices all aim to establish your website as a trusted and valuable resource in your niche.
- Local SEO: Utilizing Local SEO is an efficient way to optimize your website for local search. Registering your business on Google My Business, Yelp, Yellow Pages, and other local directories not only helps improve your visibility for local searches but also helps in getting quality backlinks. Ensure your name, address, and phone number are consistent across all platforms.
- Participating in Discussions and Forums: Active participation in relevant online communities, like Quora and industry-specific forums, can help enhance your brand recognition and establish you as an authority in your field. Providing insightful answers and including your website link (where appropriate) can drive more traffic to your site and potentially earn backlinks.
- Content Marketing: Creating high-quality, valuable content is crucial in off-page SEO. Not only does it attract backlinks, but it also provides an opportunity for others to share your content on their websites or social media platforms. This can be blog posts, infographics, videos, podcasts, or any other form of content that is useful to your audience.
- Influencer Outreach: Collaborating with influencers in your industry can boost your visibility to a relevant audience. This could be through guest blogging, product reviews, interviews, or collaborations on content. Each of these can provide valuable backlinks and increase your website’s exposure.
- Social Media Marketing: While social signals (like shares, likes, and comments) aren’t direct ranking factors in Google, a strong social media presence can boost your SEO indirectly. Sharing your content on social platforms extends its reach, increases the chances of it being linked to, and drives more traffic to your site.
- Submitting to Sharing Sites: Depending on the nature of your content, you can submit it to various sharing sites, such as Vimeo or Dailymotion for videos, SoundCloud or Podbean for audio, and Flickr, Instagram, or Pinterest for images. These platforms can help extend the reach of your content and earn backlinks.
- Building Relationships: Networking and building relationships with influencers, bloggers, and other businesses in your industry can lead to more opportunities for backlinks, collaborations, and sharing of your content. This, in turn, enhances your reputation and trustworthiness.
Off-page SEO is a long-term and ongoing process, but by integrating these best practices into your strategy, you can enhance your website’s authority, improve your search engine rankings, and ultimately drive more organic traffic to your site.

Promoting Your Blog And Building An Audience
Below mentioned are some things that can help you in promoting your blog.
- Know Your Audience: The first step in start a blog is to understand who your audience is and what they’re interested in. This will help you tailor your content to their needs, leading to more engagement and shares.
- Create High-Quality, Engaging Content: Content is king. Always strive to provide valuable, unique, and interesting content that will keep your audience coming back for more. Quality content is more likely to be shared by your readers, extending its reach.
- Leverage Social Media: Share your blog posts across your social media platforms. Use engaging headlines and visuals to attract clicks. You can also use targeted ads to reach a wider audience.
- SEO Optimization: Optimize your blog posts with relevant keywords to help them rank higher in search engine results. This includes both on-page and off-page SEO techniques.
- Guest Posting: Write guest posts for other relevant blogs in your niche. This can help you reach a new audience and earn valuable backlinks. Be sure to choose reputable sites for guest posting to maintain the quality of your links.
- Engage with Your Readers: Respond to comments on your blog and social media posts. This encourages more engagement and helps to build a community around your blog.
- Email Marketing: Build an email list and send out regular newsletters with updates, new posts, and relevant information. This keeps your readers engaged and encourages repeat visits.
- Use Visual Content: Include relevant images, infographics, and videos in your blog posts. Visual content is more engaging and more likely to be shared.
- Influencer Marketing: Partner with influencers in your niche. They can help promote your blog to their followers, potentially leading to a surge in traffic.
- Regular Updates: Maintain a regular
posting schedule. This gives your readers something to look forward to and can help improve your search engine rankings.
- Networking: Attend industry events, webinars, or workshops. This allows you to meet other bloggers, influencers, and potential readers. You can learn from their experiences and potentially collaborate to boost each other’s audience reach.
- Offer a Freebie or Run a Contest: Offering something for free, like an eBook or a product, can encourage more people to visit your blog and sign up for your email list. Contests can also generate excitement and increase traffic.
Remember, building an audience takes time and consistent effort. Stay patient and committed, and over time you’ll see your audience grow.
How To Monetize Your Blog
Monetizing a blog can be a great way to earn income from your online presence. Here’s how to go about it:
- Advertising: Displaying ads on your blog is one of the most common ways to monetize. This can be done through platforms such as Google AdSense, which pays you when visitors click on ads, or you could directly negotiate with businesses for ad space on your blog. And also Mediavine is a full-service ad management company helping content creators optimize their websites and maximize advertising revenue which also helps in advertising.
- Affiliate Marketing: Affiliate marketing involves promoting products or services from other companies. You receive a commission for every purchase made through your referral link. Some popular affiliate marketing networks include Amazon Associates, CJ Affiliate, and ClickBank.
Choosing the right Affiliate marketing program:
- Retailer Programs: These are often offered directly by major online retailers like Amazon.
- Network Programs: Affiliate network programs like ShareASale or ClickBank offer a wide variety of products from different companies.
- Direct Programs: Some companies run their own affiliate programs, which can offer higher commission rates.
- Service-based Programs: If you’re in a niche that deals with digital services (like web hosting or online courses), there are many affiliate programs that offer a recurring commission.

- Sponsored Posts: Companies may pay you to start a blog posts that mention their products or services. Be sure to disclose sponsored content to your readers as it’s not only ethical but often a legal requirement.
- Sell Digital Products: If you have skills or knowledge that others may find valuable, consider creating and selling digital products, such as eBooks, online courses, webinars, or printable resources.
- Sell Physical Products: Depending on your blog niche, you might also be able to sell physical products, like merchandise, handmade crafts, or other goods.
- Membership/Subscription: If your blog provides premium content, you might want to consider offering a membership or subscription service. Subscribers pay a regular fee to access exclusive content, resources, or experiences.
- Consulting or Coaching Services: If you’re an expert in your field, you might offer consulting or coaching services to your readers. This can range from one-on-one coaching sessions to larger workshops or webinars.
- Use a Donation Model: If your readers find real value in your content, they might be willing to support your blog through donations. Websites like Patreon allow creators to receive regular donations from supporters in exchange for additional content or perks.
- Create a Job Board: If your blog is in a professional niche, you could create a job board and charge companies to list their job openings.
- License Your Content: If your blog contains high-quality content, you might be able to license it to other sites, newspapers, or magazines for a fee.
Remember, not every monetization strategy will be suitable for every blog. Choose the methods that align best with your audience’s needs and the kind of content you provide. It’s also important to keep providing high-quality, valuable content; monetization should never come at the expense of your readers’ trust and engagement.
Conclusion
When it comes down to it, start a blog is about more than just a passion for writing—it’s about creating value, building an audience, and leveraging that into a successful business model. But remember, this isn’t an overnight process. You need to work on it consistently and be patient. It takes time to grow an audience and even more time to monetize your blog successfully.
But don’t let the challenge deter you. The rewards of building your own online platform and sharing your expertise with the world are truly priceless. Whether it’s on-page SEO, off-page SEO, or understanding how to star a blog effectively, every step brings you closer to your goals.
Always keep learning, and remember, in the world of digital marketing, change is the only constant. So, stay adaptable, stay informed, and most importantly, keep creating content that resonates with your audience.
Because at the end of the day, your audience is the heart of your blog. And with every blog post you write, you’re not just building a website, you’re building a community. A community that values your insight, your perspectives, and looks to you as a leader in your niche. And that, my friends, is a blogging success. You can explore Bloggerzilla for more exciting content.